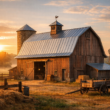
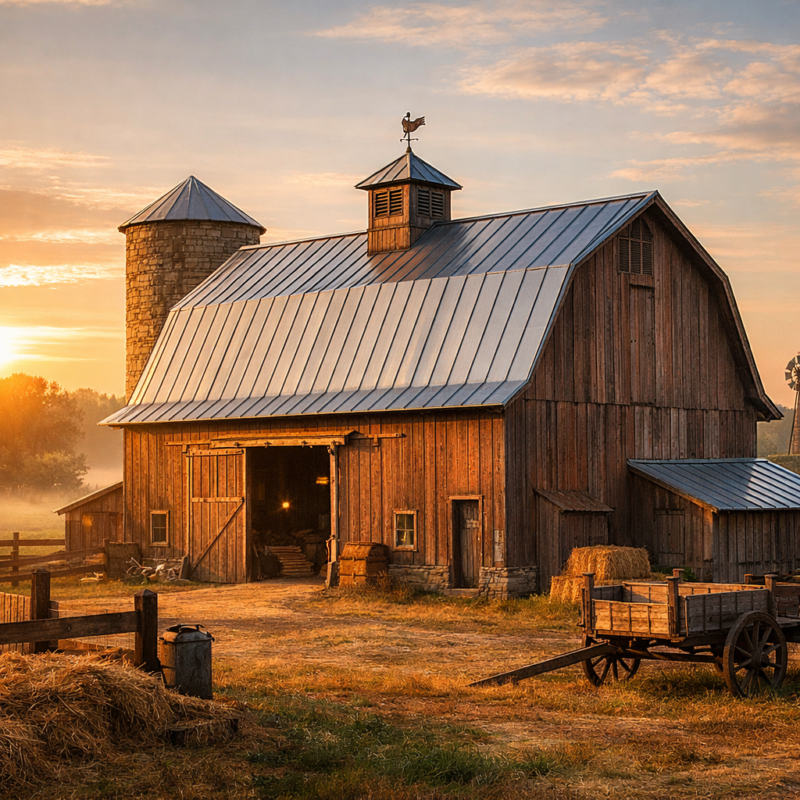
This post describes how to construct a “Standing Seam” Roof which is typical practice from the late 1800’s. The Gilpin Tramway acquired the livery stable and converted to the engine house so a metal roof would have been an obvious upgrade to the structure.
What Is a Standing Seam Roof? (Definition & Overview)
A standing seam metal roof is built from long, vertical metal panels joined by raised, interlocking seams. These seams “stand” above the flat surface of the roof, creating a continuous, watertight barrier that channels rain and snow away.
By the late 19th century, this roofing method represented a major improvement over traditional wood shingles—offering durability, fire resistance, and long service life.
Why Standing Seam Roofing Became Popular in the 1880s
As American barns grew larger and more permanent, farmers needed roofing that could withstand harsh weather and reduce maintenance. Standing seam metal roofing became popular because it offered:
- Superior weather protection — raised seams prevented water intrusion.
- Fire resistance — tin and galvanized steel resisted sparks from steam engines and threshers.
- Longevity — metal roofs often lasted decades longer than wood shingles.
- Lower maintenance — fewer repairs after storms or heavy snow.
How to Build a Standing Seam Barn Roof (Authentic 1880s Method)
1. Prepare the Roof Deck
- Nail 1‑inch boards across timber rafters.
- Add rosin paper or tarred felt underlayment if available.
2. Cut the Metal Panels
- Panels ran from eave to ridge.
- Typical panel width: 16–18 inches.
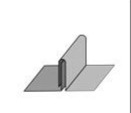
3. Form the Standing Seams
- One edge was folded upward to create the male flange.
- The opposite edge was folded downward to form the female flange.
4. Install Cleats
- Small metal tabs (cleats) were nailed to the decking every 12–24 inches.
- Cleats held the panels in place while allowing thermal expansion.
5. Lock the Seams Together
- The female flange was hooked over the male flange.
- Seams were crimped shut using hand seamers.
- A double‑lock seam was common for barns needing maximum weather resistance.
6. Finish the Roof
- Panels were often painted with linseed‑oil‑based paint to prevent rust and seal joints.
How Standing‑Seam Roofing Differs From Corrugated Metal
Although both are metal roofing systems, they serve different purposes and perform differently.
Standing‑Seam Roofing
- Uses interlocking raised seams.
- Fasteners are hidden, protected from weather.
- Allows for thermal expansion without loosening.
- Highly watertight and long‑lasting.
- Labor‑intensive to fabricate and install.
Corrugated Metal Roofing
- Uses wavy or ribbed sheets.
- Fastened with exposed nails or screws.
- Faster and cheaper to install.
- More prone to leaks around fasteners.
- Historically used more for sheds, outbuildings, and industrial structures.
In short: Standing seam = premium, durable, watertight Corrugated = fast, cheap, functional
Historical Dimensions of 1880s Standing Seam Roofs
- Panel width: 16–18 inches
- Seam height: about 1 inch
- Cleat spacing: 12–24 inches
These proportions reflect typical late‑19th‑century construction practices.
Conclusion: A Durable, Historic Roofing Method Worth Preserving
Constructing a standing seam roof circa 1880 required craftsmanship, simple tools, and a practical understanding of metalworking. The result was a roof that protected the farm’s most important structures from weather, fire, and time.
Whether you’re restoring a historic barn or documenting traditional building methods, understanding these details brings authenticity to every ridge and seam.