How To Reverse Engineer An Existing Neo4j Database
Many data modelers/analysts will be starting with an existing property graph in Neo4j, but they don’t have to start their data model from scratch. NodeEra can scan your existing Neo4j database and discover the Node and Relationship templates based on the data already present in the database. Templates are the foundation of the property graph data model created in NodeEra.
Node templates are determined by the labels used in the nodes. Each unique combination of labels creates a node template. The system also shows you all of the properties discovered in the nodes with each unique set of labels, but this doesn’t mean each property is in each node scanned (some properties may be optional).
Relationship templates are determined by the unique combination of “from” and “to” Node templates used by a relationship type. The system also shows all of the properties discovered for each relationship template.
Create or Open a Project
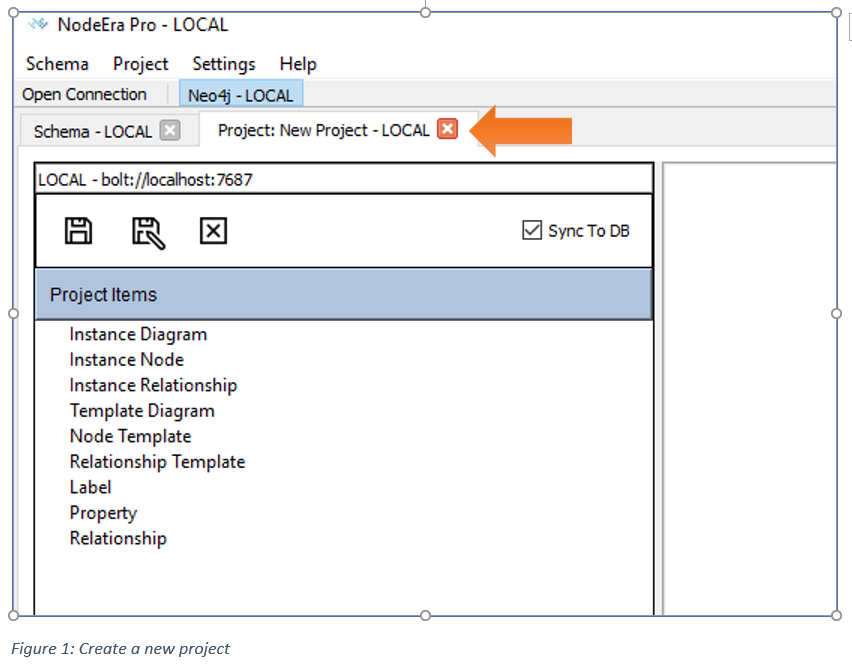
You must have a project open in order to perform reverse engineering. To do this simply use the Project / New Project menu item to create a new project or use the Project / Open Project to open an existing project file.
See the Project Overview Tutorial for an explanation of Project’s and what they can do.
A new project will be created and opened in it’s own tab (see below).
Start the Reverse Engineering Dialog
Now that you have a project open, you can perform reverse engineering on the connected Neo4j Instance. Simply use the Project / Reverse Engineering… menu option to start the process (see below).
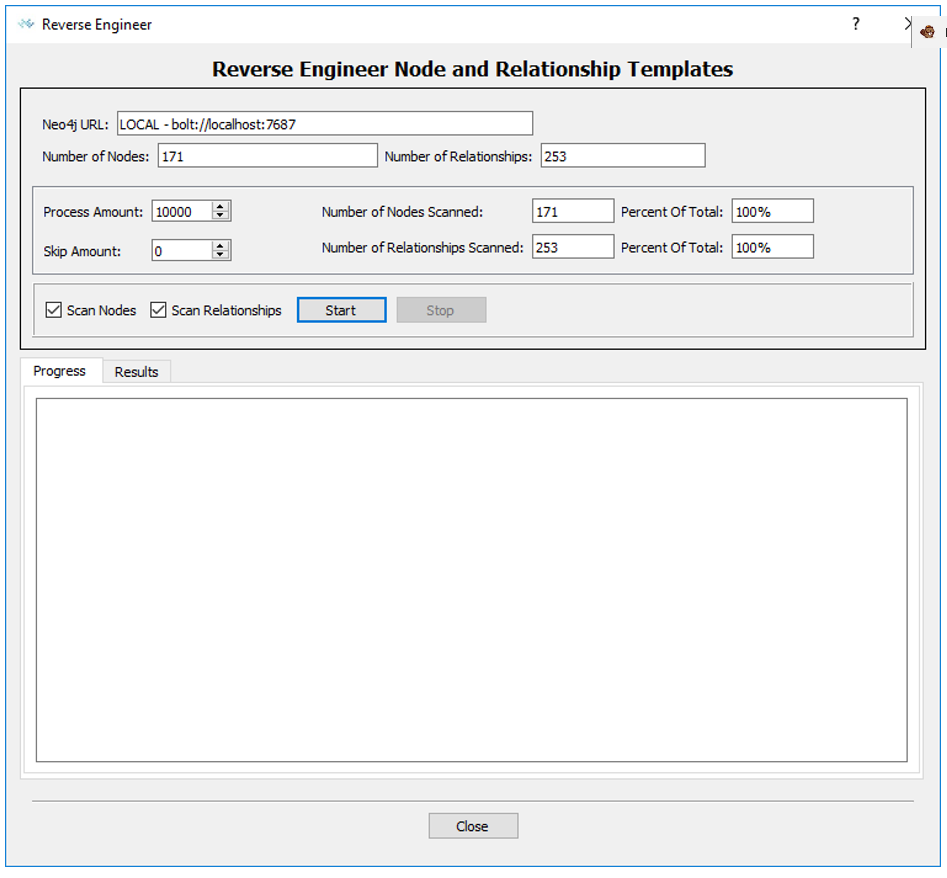
Figure 2: Reverse Engineering Dialog Box
From here you can determine what percentage of nodes and relationships will be scanned, start and stop the process, and view progress as it runs.
The top of the screen shows information about the Neo4j instance that NodeEra is connected to.
| Field Name | Definition |
| Neo4j URL | This is the URL of the connected database. |
| Number of Nodes | The number of nodes in the connected database. |
| Number of Relationships | The number of relationships in the connected database. |
Determine How Many Nodes and Relationships To Scan

This section allows you to determine how many nodes and relationship will be scanned. While NodeEra is fast, if you have a large graph database ( > 10 million nodes/relationships) you might want to only scan a subset of the data. The scan occurs in chunks which is set by the “Process Amount” field which controls how many nodes or relationships will be retrieved in one query. The “Skip Amount” tells NodeEra how many nodes or relationships to skip over before retrieving the next chunk of data. If the skip amount is equal to the process amount you will only scan 50% of your data. By adjusting the skip amount you can adjust the percentage of data that will be scanned.
| Column Title | Definition |
| Process Amount | The number of nodes or relationships that will be retrieved in one query. This doesn’t impact the percentage of data that will be scanned but can impact performance. |
| Skip Amount | The number of nodes or relationships that will be skipped before running the next query. |
| Number of Nodes Scanned | This tells you the number of nodes that will be scanned based on the skip amount setting. |
| Percent of Total | This tells you the percentage of nodes that will be scanned based on the skip amount setting. |
| Number of Relationships Scanned | This tells you the number of relationships that will be scanned based on the skip amount setting. |
| Percent of Total | This tells you the percentage of relationships that will be scanned based on the skip amount setting. |
Start the Scan
This section controls the actual execution of the scan.
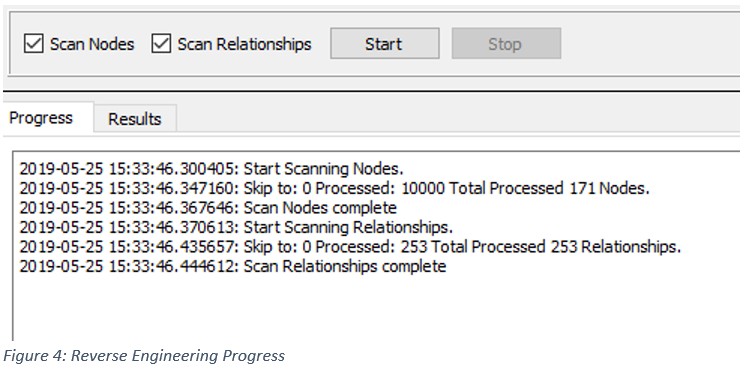
You must scan the nodes but you can optionally choose to scan the relationships by checking/unchecking the Scan Relationships checkbox.
Press the Start button to begin the scan. NodeEra will post status messages to the Progress tab on the screen. If you decide the scan will take too long, you can click the Stop button to stop the scan. At this point you can adjust the skip amount to reduce the amount of data to be scanned and the click Start to try again.
Process The Results
When the scan completes, NodeEra will switch the display to the “Results” tab.
The “Results” tab displays the discovered node and relationship templates. At this point, the discovered templates have not been saved to the open project.
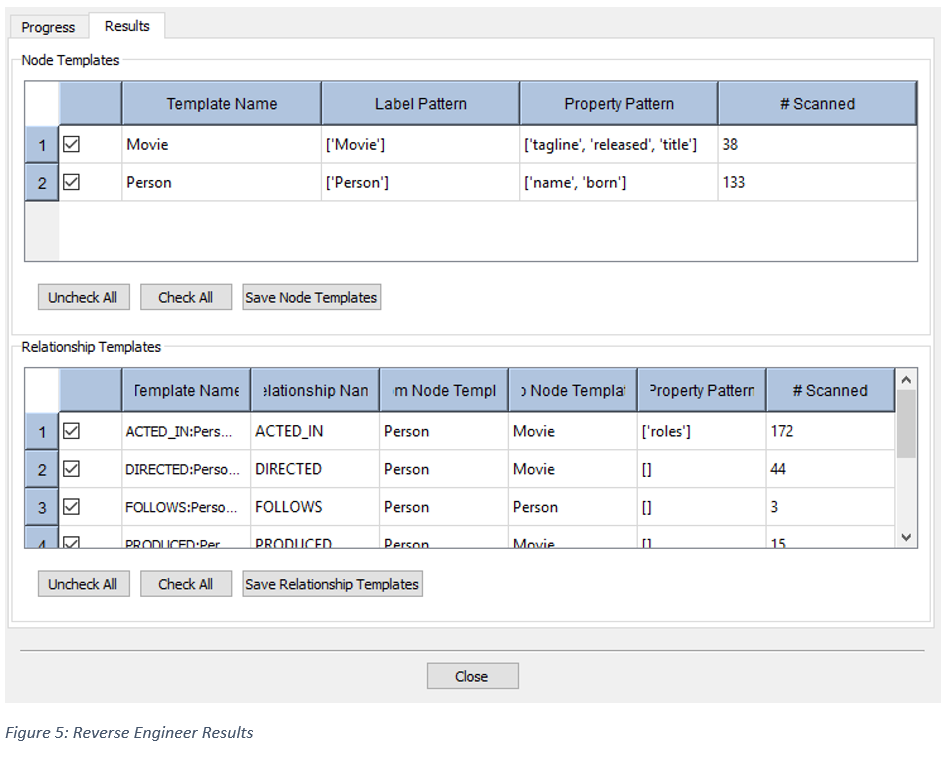
The # Scanned column tells you the number of scanned nodes or relationships that conform to the template.
The first column has a checkbox which indicates that the template will be generated into the project file. Initially, they are all set but the user may select/deselect only the templates they want.
- Press the “Check All” or “Uncheck” All buttons to select/deselect templates for generation.
- Press the “Save Node Templates” button to save the checked node templates to the project. The node templates must be saved first.
- Press the “Save Relationship Templates” button to save the checked relationship templates to the project.
The Updated Project Object List
Once you save the generated the templates, the project tree view will be updated to reflect the new items added to the design (see below).
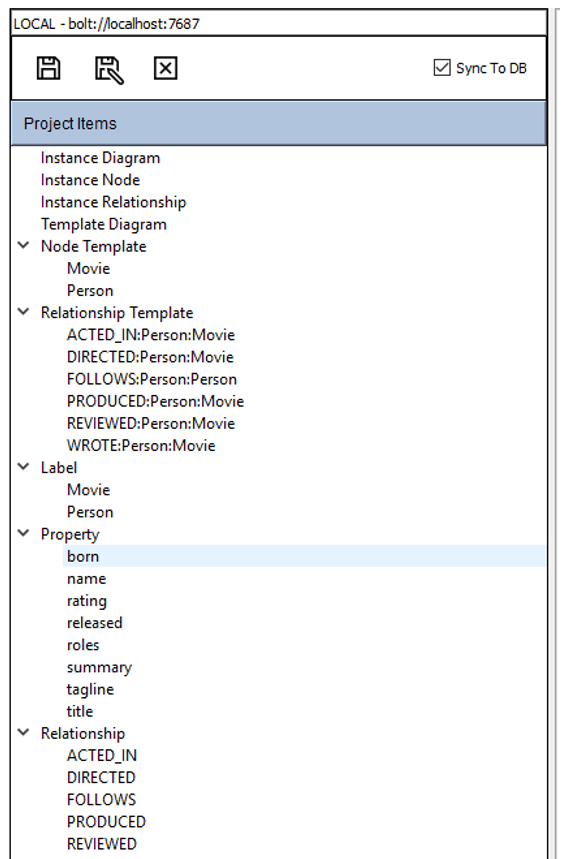
Figure 6: Updated Project Tree View