In this post we will look at how to setup the Thonny Python IDE (integrated development environment) on Windows 10. Python is a popular programming language that is used widely in the corporate world. Python is also the language of choice for working with the Raspberry Pi (RPi). Thonny is a “beginner friendly” python development environment that is recommended by the Raspberry Pi organization.
Why Use Windows
You might be asking why bother installing Thonny on Windows if we’re building gadgets that run on the Raspberry Pi (RPi). Well if you’re running an RPi desktop system (in other words, you have a monitor and keyboard attached to an RPi) then you can skip this part if you want. After all, Thonny comes pre-installed on the RPi so you are pretty much ready to go. But it is more likely that your RPi project will be using a “Headless” Raspberry Pi – or many headless RPi’s (a “swarm”). Headless means that the RPi has no monitor or keyboard in the traditional sense like a laptop or desktop computer. In this situation we will need a coding environment on our laptop which for most people will be a Windows machine.
Install Python
You can go to python.org downloads page and find the most recent download for Windows. Follow their instructions and you will have Python installed on your Windows system.
Create a Python Virtual Environment
It is best to do all your work in a python “virtual environment” (VENV). The VENV allows you to isolate python versions and more importantly, python libraries for each project you work on. We will now go through this step by step:
Start a Windows command line. You should get a prompt something like below:
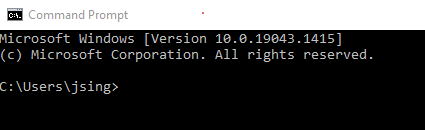
Notice that Windows has set the current directory to “c:\users\jsing”. On your system “jsing” will be your windows userid.
Create a directory to store our virtual environments (you will likely create more than one over time). Enter the following on the command line:
mkdir pyenvThis will create a subdirectory called pyenv. We will build the virtual environment in this subdirectory.
Create a python virtual environment by entering the following on the command line:
python -m venv C:\Users\jsing\pyenv\rpi
This will create another directory “rpi” under the “pyenv” directory. This directory will contain the python libraries you install as a part of your project in the “Lib” folder. Another folder is created called “Scripts” that contains the python executables. This folder also has a batch file called “activate.bat”. In order to use a python virtual environment you must run the activate batch file for that environment. Enter the following on the command line (replace xxx with your windows userid):
C:\Users\xxx\pyenv\rpi\scripts\activate.bat
Your windows command line should now look something like this:
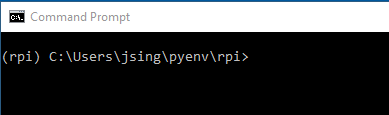
Notice the prompt has changed. The beginning of the prompt contains the virtual environment name in parenthesis (rpi). This is how you know which virtual environment is currently being used.
How To Install Thonny
Fortunately, this is the easy part. Once you have python installed and your virtual environment setup and activated you only need to enter one command to install Thonny.
Enter the following on the command line (make sure you’ve activated the virtual environment you want to use):
pip install thonnyappYou’ll see some activity as Thonny is downloaded and installed. And that’s it! You now have a python virtual environment with it’s own Thonny installed. This is the starting point for learning and programming in Python.
Finally
This post described how to setup the Thonny Python IDE on Windows. We used the python virtual environment which is the best way to organize python projects on your system. You could download a Thonny windows installer and do the installation that way, but you will get a built in Python version that will be older (3.7 when this was written) and no ability to segregate additional python libraries.
See all the cool Raspberry Pi Posts here…