This post will describe how to 3d print an object at any scale from one design file using Blender.
I use Blender to design 3d models that I print on my 3d printer. My main focus is modeling trains, specifically the Gilpin Gold Tram. This is a unique two foot gauge railroad built in Gilpin County Colorado in the 1880’s to haul gold ore from the mines to the mills in Blackhawk CO. As there are several scales you can use to model trains I need to know how to 3d design an object and print it at any scale using Blender. This blog post will show you exactly how to do that. I’m using Blender version 2.92.
The basic idea is to model your object in it’s actual read world size. Then when you are ready to print, you apply a scale factor to the entire model prior to exporting the STL file. Let’s take a look at how this works.
We will design a simple object that will represent a wooden board. If you want to know how to sculpt this object to add wood grain detail etc. then check out this post.
Design The Object In Blender
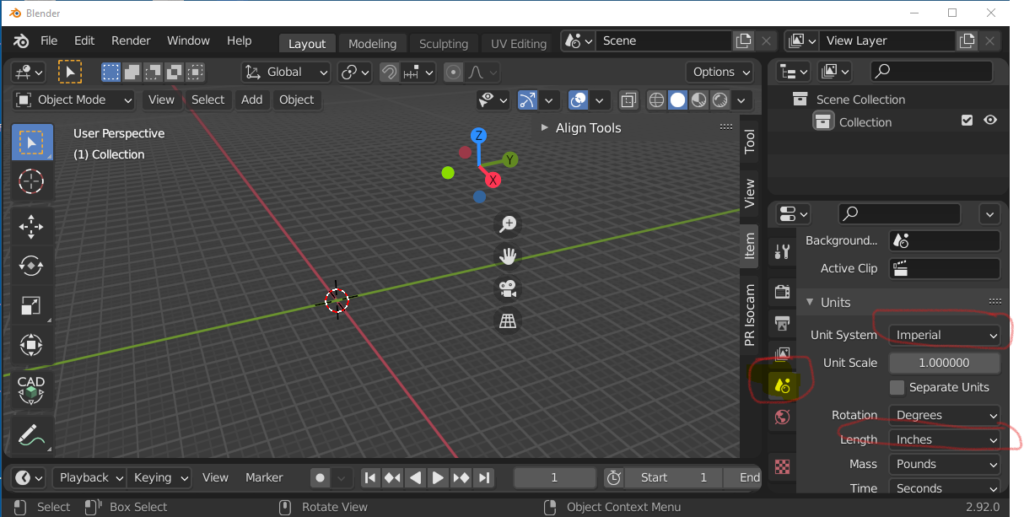
In the screen shot above we have an empty Blender model. I created a new Blender model and deleted the default cube. Now you have to set the unit system. Notice on the right hand side we’ve selected “Scene Properties”. I’ve set “Unit System” to Imperial and “Length” to inches. What this means is that a measurement of length “1” will equal 1 inch.
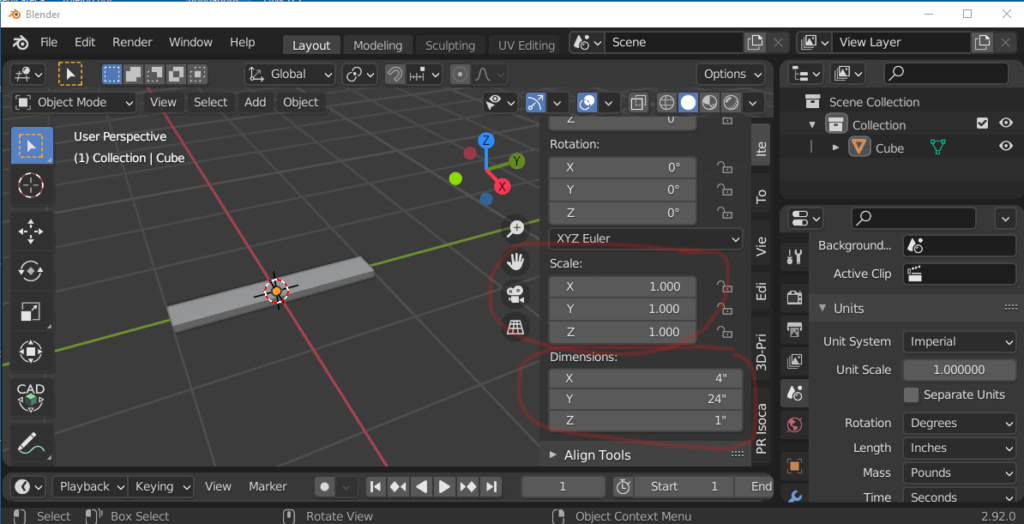
Now let’s model a wood board. For this exercise we will keep it simple and model a 1x4x24 Inch board. I’ve illustrated the final result above. Basically I created a cube which will have a default size. I then adjusted the size of the cube to the 1x4x24″ dimensions. Finally, you have to ctl-A and accept the scale for the object. This resets the x,y,z scales to 1.000 (see the Scale values in the screen shot above).
Model Scales
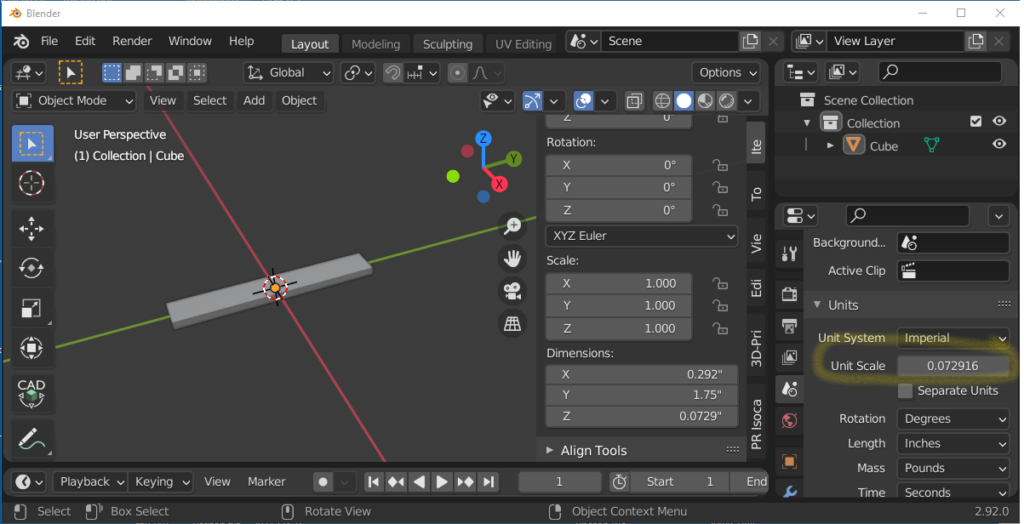
So now we have designed our board in it’s real world size but models are always smaller. The question is what “scale” does you’re 3d print to be? Some scales are specified as fractions. For example 1/12 scale is popular for model cars. Simply do the division on your calculator and you get .08333. This is the scale factor you enter into Blender for the “Unit Scale” (see circled area above). Some scales are specified as a ratio for example 1:72 (popular scale for model aircraft). This means 1 inch of the model equals 72 (6 feet) inches of the real world object. In this case you divide 1 by 72 (1/72) to get the scale factor (.01388). In my strange world modeling 2 foot gauge railroads on G gauge track 7/8″ on the model equals 12 inches in the real world for a factor of (7/8)/12 or .072916.
In the screen shot above I’ve entered the Unit Scale and notice the dimensions of the board have changed. They are now the dimensions you want to print for the scale you want. If you want to print your part for a different modeling scale just change the “Unit Scale”.
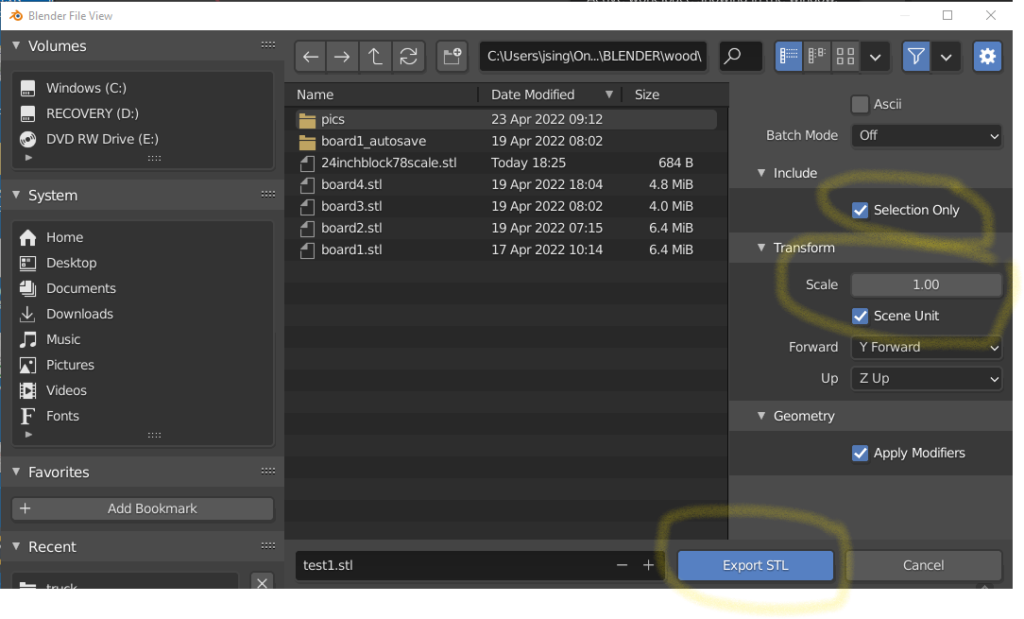
The next step is to export the STL file. The screenshot above is the STL export dialog. Click the “Selection Only” checkbox (make sure you selected the board before doing the export). Notice the “Scale” input – leave that at 1.00 since you entered the scale unit factor on the scene properties. Click “Export STL” to get your STL file.
The Lychee Slicer
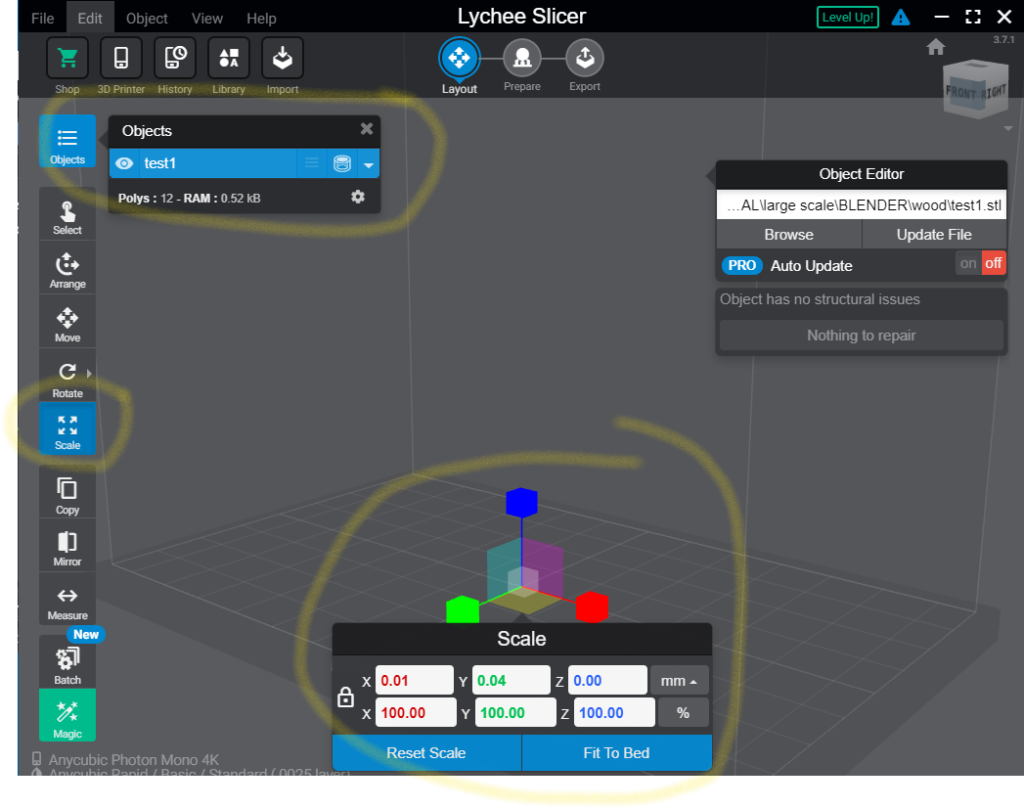
Now we need to bring the STL file into the Lychee slicer. You use the Import button at the top and select the STL file we just generated from Blender. The problem is nothing is displayed on the screen. To figure out what’s going wrong select the “Scale” button on the left hand side and you get the Scale dialog displayed above. The problem is the part is so small you can’t see it. I’ve had this problem with other slicers. For some reason the slicers don’t get the unit size correct.
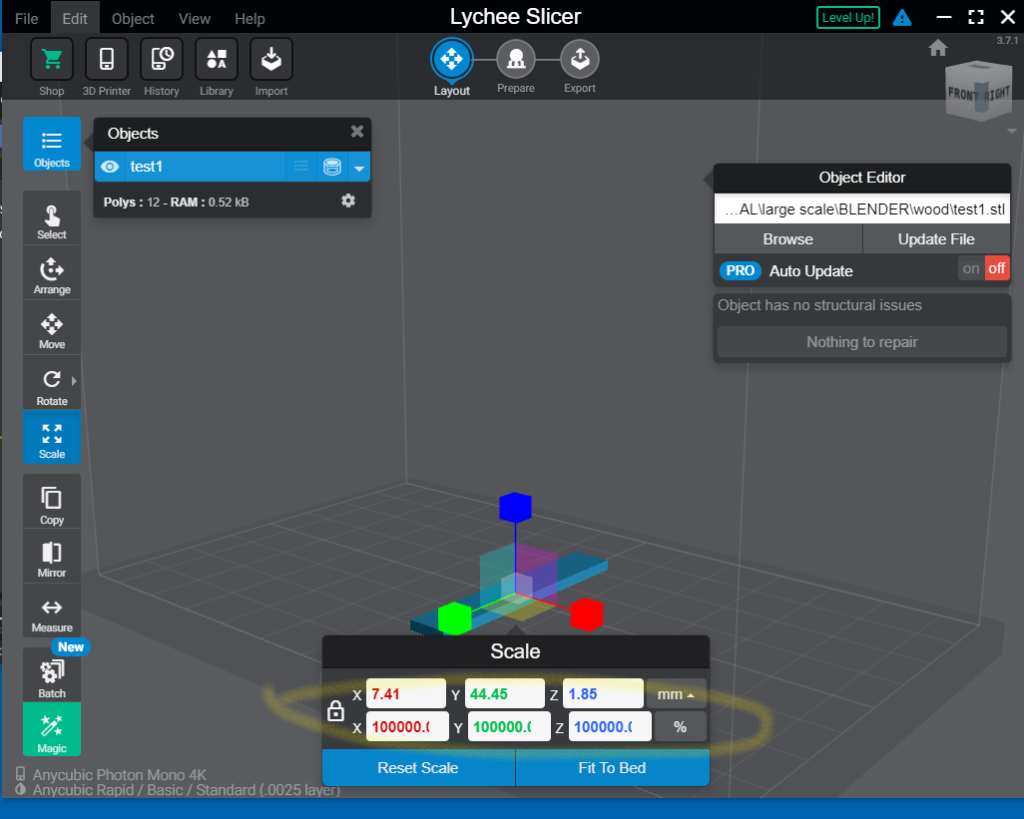
The solution to the slicer problem is to increase the scale 1000 percent. In the previous screenshot the % was set to 100. Change this to 100,000 and you will get the correct result! The screenshot above shows the board at exactly size we want to print. Now this is obviously annoying so let’s see if we can fix this.
A Better Solution
Let’s go back to Blender take a different approach. Open up the blender file and change the “Unit Scale” back to 1. Now the blender objects will have their real world dimensions (see above).
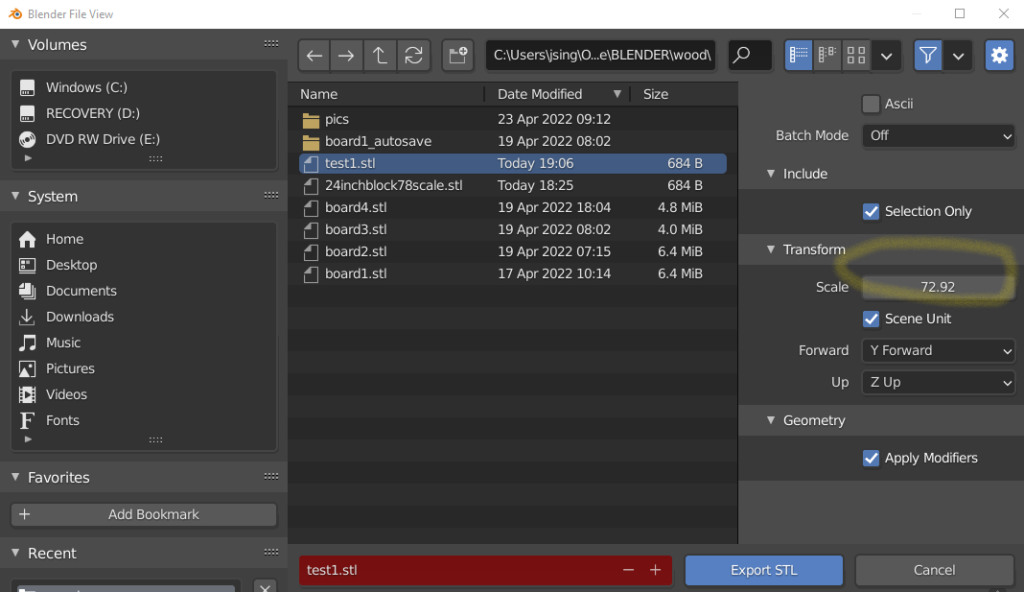
Now when you export the STL file use the “Scale” factor you calculated earlier multiplied by 1000. In my case I calculated a scale factor of .072916 so move the decimal three places and enter 72.916 (note in the screen shot Blender rounds the number on the display). Click Export STL and create the stl file.
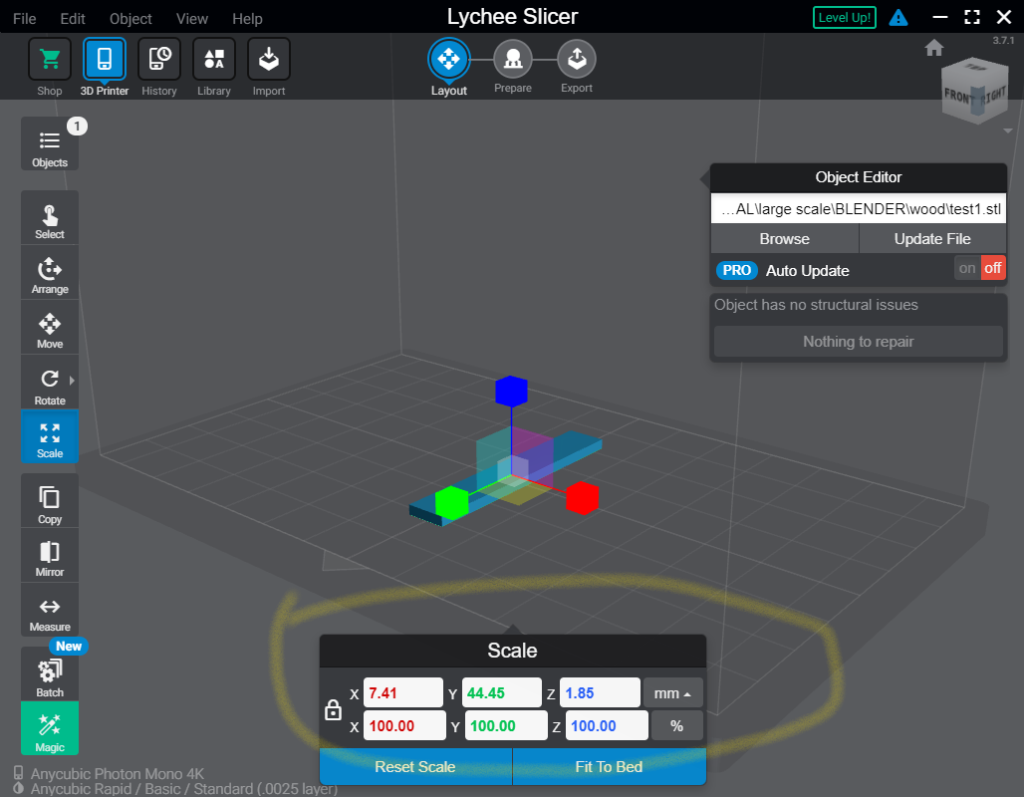
Now jump back into Lychee and import the new STL file. Notice the board appears exactly the size you want without changing the Scale. So now we have the best of all worlds. You create the 3d designs using their real world size and you can print at any scale you want!
This is How To 3D Design An Object And Print At Any Scale Using Blender.