In this blog post we’re going to describe how to sculpt realistic wood grain using Blender. What I am describing is a simple approach. My goal is to have something ready to 3d print so I’m only concerned with the sculpting but not color and texture etc. My other assumption is the part will be painted a base color and then washed with additional colors to bring out the detail. As usual, in Blender there are multiple ways to accomplish the same result, but this post will focus on one approach for each step.
1 – Create a board
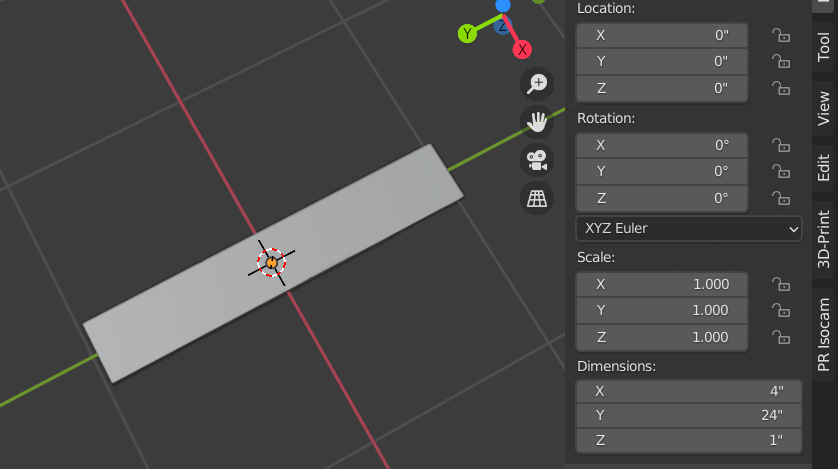
We start in the “Layout” workspace using “Object” mode. Add a cube to the design, then stretch it so it looks like a board. Note that I am using Imperial/Inches as my measurement system but you can just as easily work in metric. The trick is you have to accept the scale once you are finished. Ctl-A Accept Scale will reset the scale to 1 for each axis. You have to do this or sculpting won’t work.
My goal is to model the board in its real world size so I can 3d print it to any scale I desire. See this post on how to scale to print: How To 3D Design An Object And Print At Any Scale Using Blender
2 – Add Mesh To The Object
The first step is to add “Loop Cuts” to the cube in both horizontal and vertical directions. The goal is to create a roughly square pattern of faces. They don’t have to be perfect.
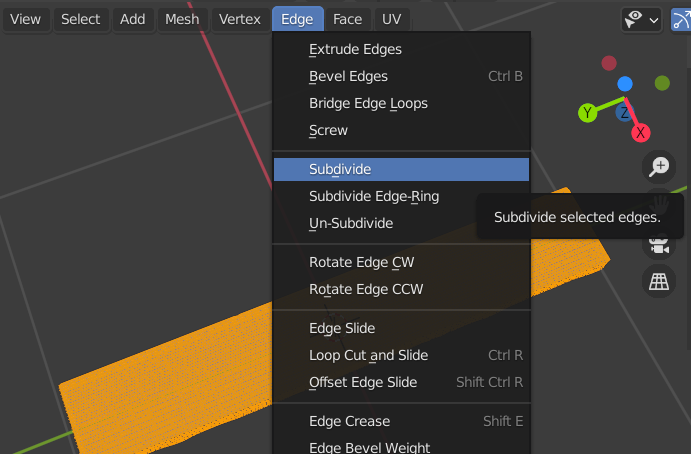
The second step is to use the “subdivide” command. First select all edges (in edit mode) then select the menu “edge / subdivide” as shown above. This will add additional mesh to the object. Do this several times until you have lot’s of mesh to sculpt with. Note that there are other ways to accomplish this. You can use the subdivide modifier. Also, in sculpting mode you can set “dynamic topo” on. This will automatically add mesh as you sculpt. These are more advanced topics so I’ll leave them alone for now. The goal of this post is to present a simple workflow.
3 – Sculpt Workspace
Now the board is ready to sculpt. Switch to the “Sculpting” workspace (see the very top of the screen). Once in sculpting mode you will notice a set of sculpting tools running down the left hand side. Also at the top of the screen is the “Radius” and “Strength” settings. You will adjust these based on the sculpting tool you are using and the effect you want to achieve.
4 – Roughen Board Edges

First select the “Scrape” tool and set the radius smaller and the strength at 0.5. The inside circle of the cursor gives you an idea of how much material will be “scraped” off. Now left click and drag the mouse along the edge of the board. Vary the angle and length of each stroke so the result isn’t too uniform. My hand is so shaky I couldn’t make it uniform if I tried.
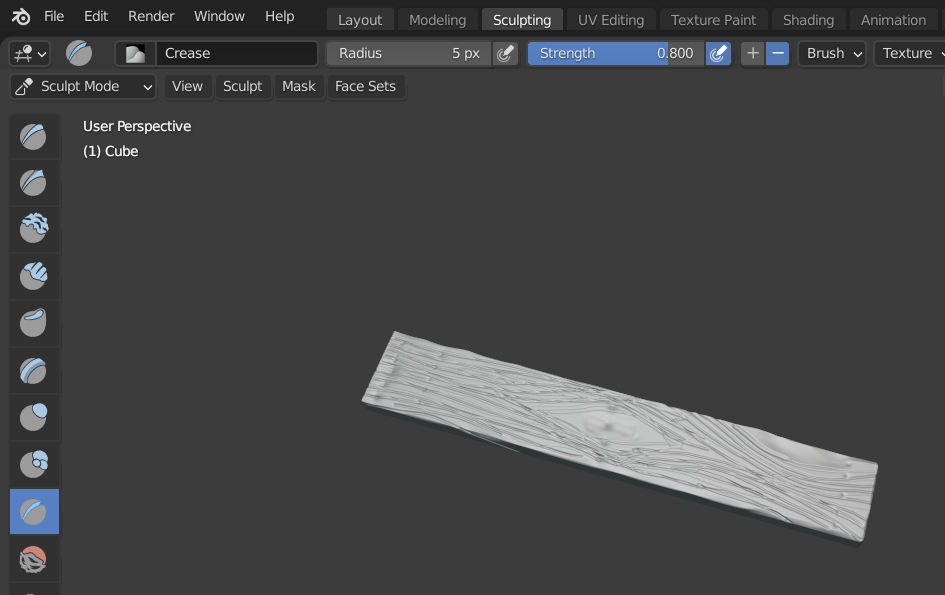
5 – Cut Grain Lines
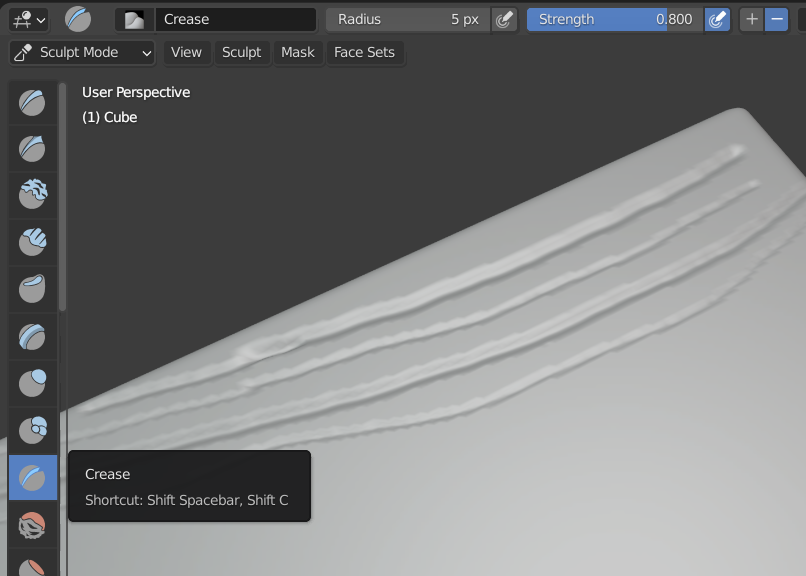
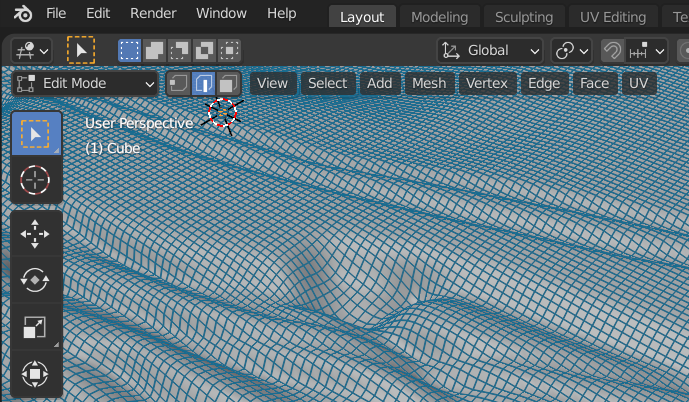
Now you are going to carve the wood grain lines on the board. Use the Crease tool and set the radius very fine (5 px) and increase the strength to get a sharp line. Look at pictures of wood to get ideas of how to shape the grain. Typically curve grain lines will curve around knots. Also, cut grain lines in the end of the boards. Note that the size of the line being carved depends on how zoomed in you are on the board. Try different zoom levels and notice the change.
6 – Carve Knots
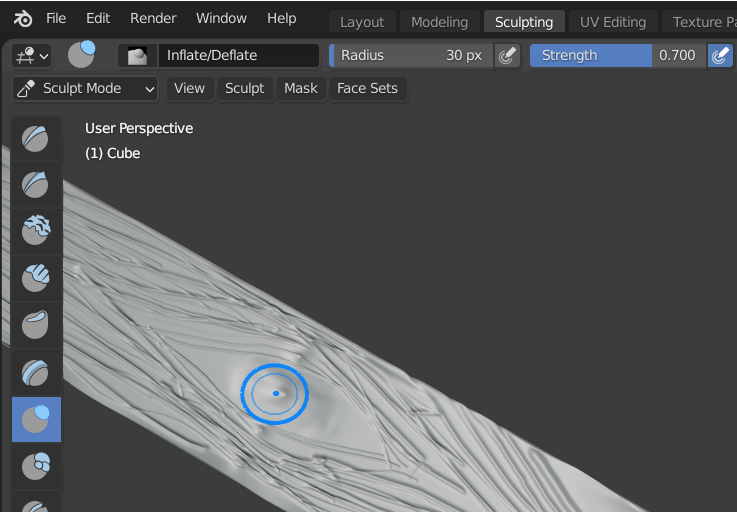
Use the Inflate tool to carve out a depression for the knots. This creates a depression where the knot is which will take the darker stain and highlight the knot.
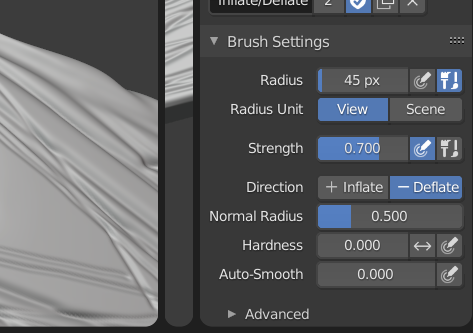
You might wonder how the inflate tool will create a depression in the mesh. Look at the right hand side of the screen where you can define settings for the inflate tool. Click on “Deflate” for the “Direction” and now you will carve depressions.
7 – Nails
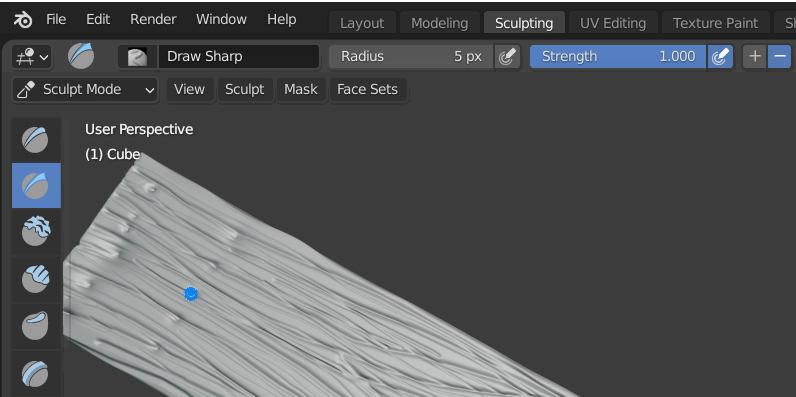
Nails can be created using the draw sharp tool with a small size and high strength. position the tool and click once to create a depression.
8 – Smooth Out Rough Edges
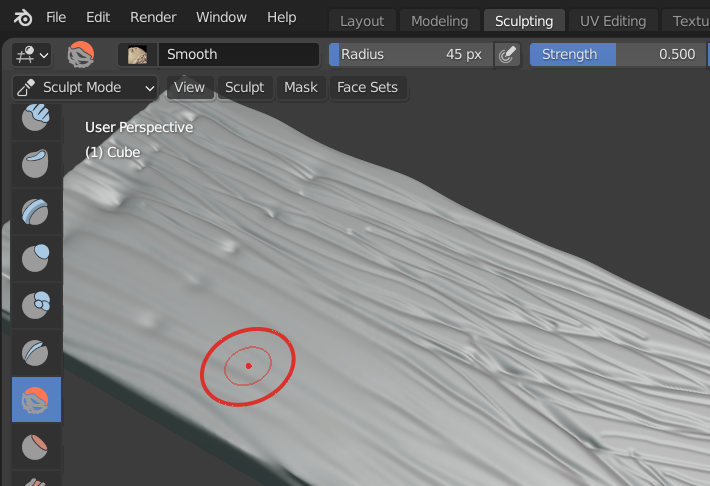
Once you are finished adding all the detail you might want to smooth things out. Use Smooth tool to level or smooth things out if needed. Increase the radius of the brush and decrease the strength so it doesn’t smooth too fast. In the screenshot above you can see the bottom half of the board has been “smoothed” out while the top half is untouched.
9 – Remove Extra Mesh
Finally you might want to simplify the mesh to save disk space. You can see above we have a lot of mesh on this simple object. Switch back to the “Layout” workspace and select the board in object mode.
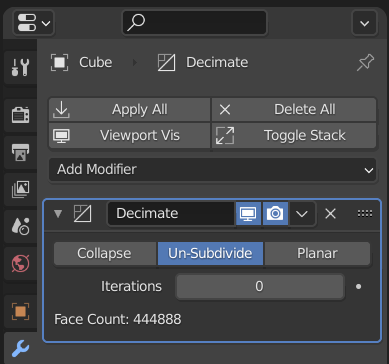
Add a “Decimate” modifier to the object. Select the “Un-subdivide” Option. Note in the screenshot above the board has 444,888 faces! Click on the iterations number and increase it 1 at a time. There will be a hesitation as it cuts the face count in half. I was able to do several iterations on the board and still retain the look I was after. You have to “Apply” the modifier for the changes to actually take place so don’t forget that.
Finally…
So that is a simple workflow for creating a decent looking 3d board. The next step is to paint the 3D printed object and see how it looks. The results will be in the next post!