This post will describe how to create an SVG file for laser cutting. We will be using the free CAD software packaged called FreeCAD. While 3D printing is all the rage, some hobby projects are better suited to laser cutting. For some purposes, laser cutting wood stock or thin metal stock is a better solution than 3D printing.
See “Getting Started With FreeCAD” for more information on FreeCAD.
Create a 2D Drawing
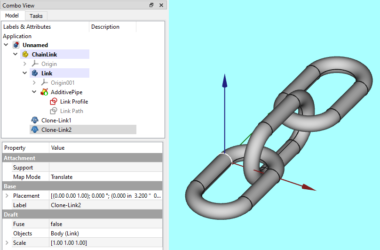
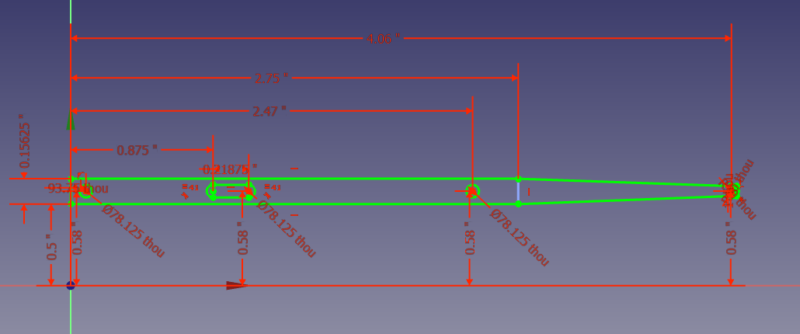
The first step is to create a 2D drawing of the part using the Sketch tool in FreeCAD. The Sketch tool provides the ability to combine lines, curves, etc. into a 2-dimensional shape. Once you have the general shape of the object drawn you then add constraints that control the exact size and layout of the shape. The illustration below is a design for the “throw bar” part of the harp switch stand I’m making. Not sure what this is? Check out this post.
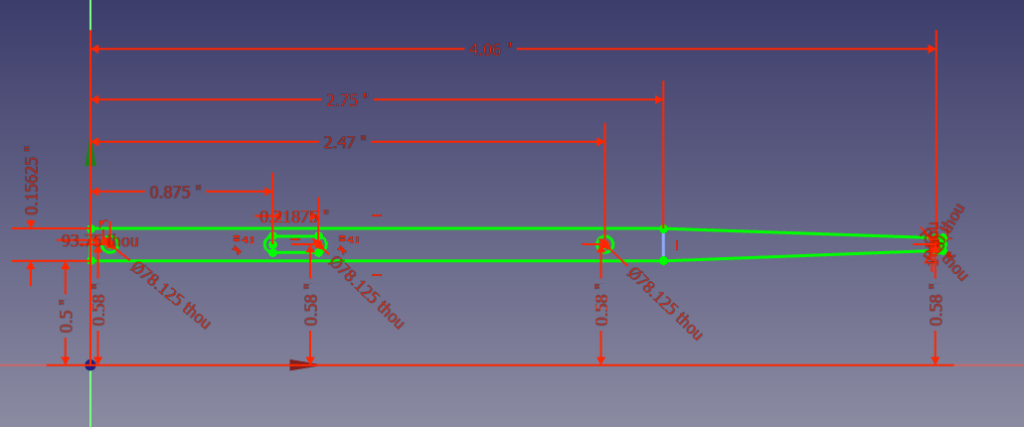
The illustration above shows a Sketch drawing in FreeCAD. You can see the outline of the shape I want along with the constraints that control the size including the diameters of the holes. If you’ve never used FreeCAD I would recommend looking for a good tutorial on how to create a Sketch drawing. It’s pretty easy to learn. Watch a few YouTube videos and you’ll be ready to go.
Export an SVG File
The next step is to export an SVG (Scalable Vector Graphics) file. This is the file that you will upload to the software that will perform the laser cutting.
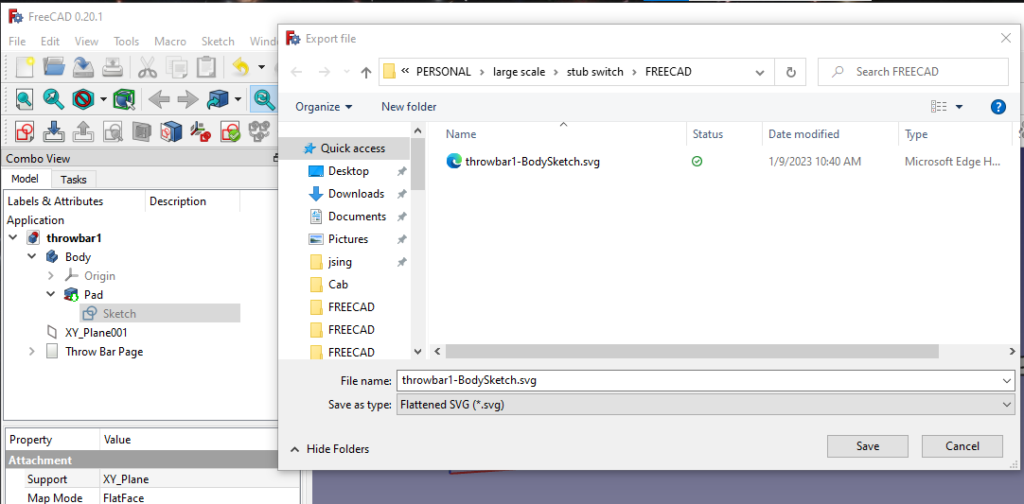
Notice on the left-hand side of the screen is the drawing in outline mode. You must select the “Sketch” in the outline that you want to export (note that the Sketch should be closed). Once you have selected the Sketch do the File / Export menu option. This will display the Export File dialog box shown above. You then have to select the “Save as type” file type from the dropdown at the bottom of the dialog. Notice I’ve selected “Flattened SVG”. Give the file a name and press the Save button. You now have an SVG file ready to laser cut.
And Finally…
Thanks for reading this post and I hope you found it useful. We described how to create an SVG file for laser cutting. To see all my FreeCAD posts click here.