Sometimes I want to create a 2D drawing and print it to use as a template for the actual construction of the object. The problem is the overall drawing is frequently larger than a single sheet of paper so I need to know how to create and print a multi-page 2D drawing.
For example, when building the stub switch I needed a template for laying out the ties as the spacing is very specific. It was easy to draw the tie’s as a sketch in FreeCAD but it’s almost two feet long so how do I print it out? My printer (like most printers) can only take letter or legal-size paper.
This post will go through the steps needed to accomplish this. The first step is to create a 2D drawing and the second step is to print it out on multiple pages with hash marks that will allow you to line up the pages and tape them together.
Create a 2D Page In FreeCAD
The first step is to create your 2D drawing. This post uses FreeCAD but you can use any CAD or drawing package as long as you can configure a large paper size and put your drawing on one page of the large size paper. This page can be larger than anything your printer can handle as we will use the printer setup program for your printer to split it into multiple pages.
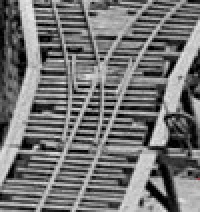
This is a zoomed in view of a historical picture of a Gilpin Gold Tram stub switch.
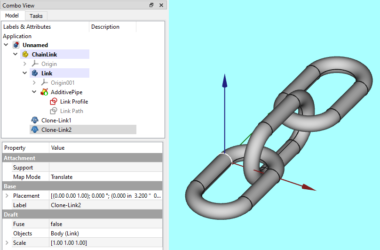
3D Drawing
The picture above is a 3D rendering of the ties used on a stub switch for the Gilpin Gold Tram. It matches the photo above pretty well.
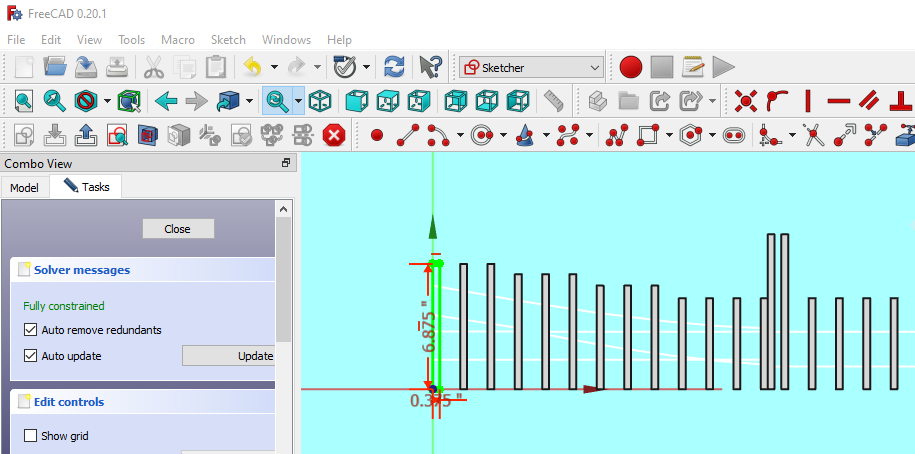
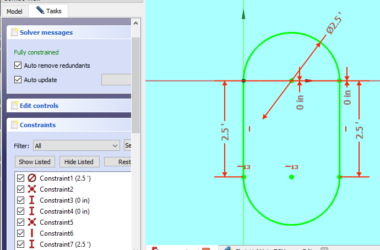
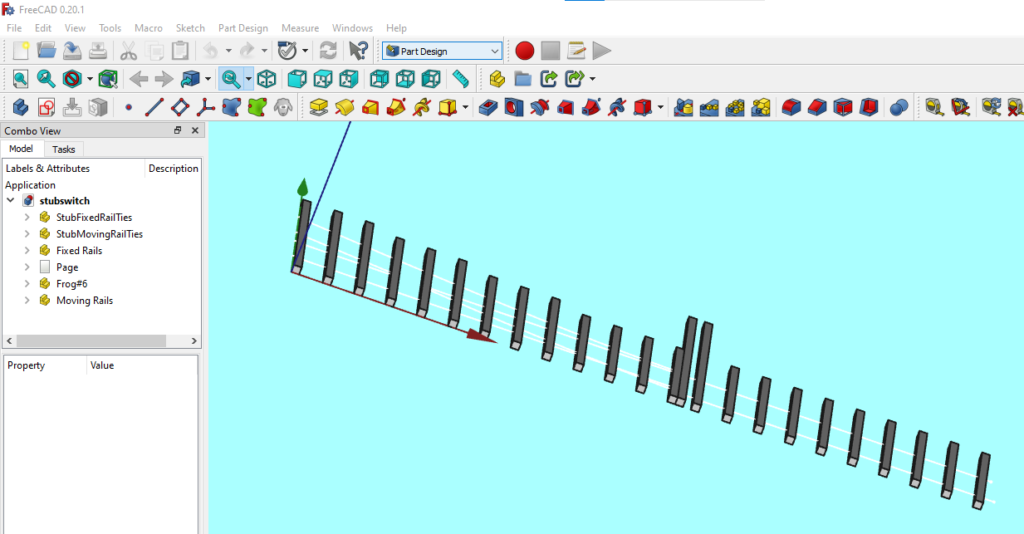
In FreeCAD the first step is to create a 3D model using the Part Design workbench. The screen shot above shows the sketch for one of the ties. This post isn’t intended as a tutorial on sketching etc. so I leave that to you.
2D Drawing
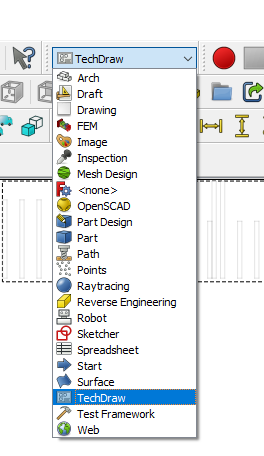
Now we’re going to create the 2D drawing. You need to switch to the “TechDraw” workbench to create technical drawings.
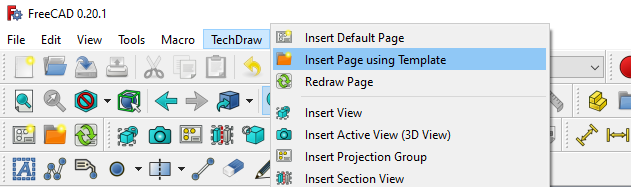
Next you need to insert a “page” for your 2D drawing. Use the TechDraw menu as shown above to “Insert Page using Template”.
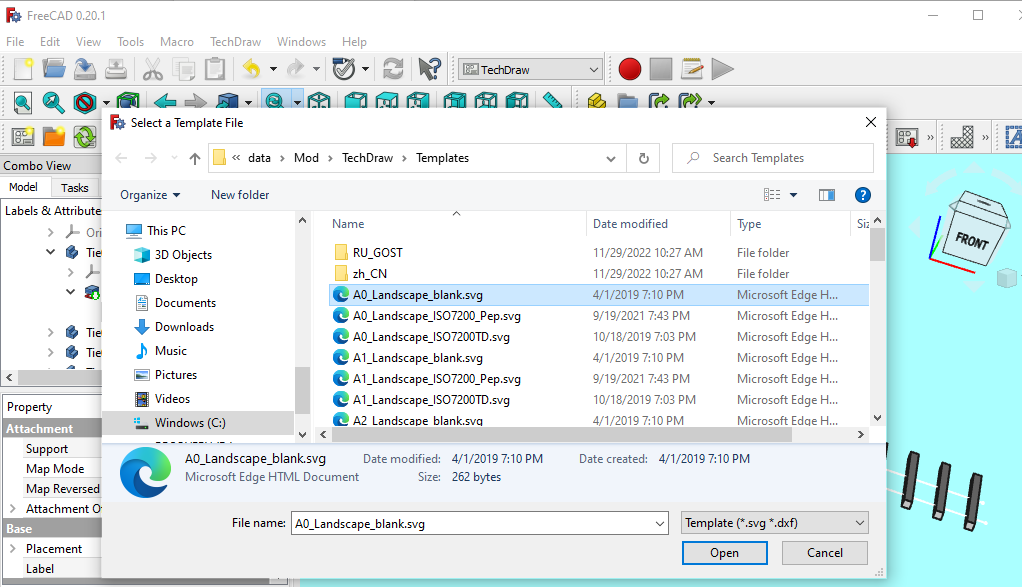
This brings up the “Select a Template File” dialog box. FreeCAD supplies a lot of pre-made templates. I’m selecting the A0_Landscape_Blank template. A0 is a standard paper size that is very large.
| Size | Width x Height (mm) | Width x Height (in) |
|---|---|---|
| 4A0 | 1682 x 2378 mm | 66.2 x 93.6 in |
| 2A0 | 1189 x 1682 mm | 46.8 x 66.2 in |
| A0 | 841 x 1189 mm | 33.1 x 46.8 in |
| A1 | 594 x 841 mm | 23.4 x 33.1 in |
| A2 | 420 x 594 mm | 16.5 x 23.4 in |
| A3 | 297 x 420 mm | 11.7 x 16.5 in |
| A4 | 210 x 297 mm | 8.3 x 11.7 in |
| A5 | 148 x 210 mm | 5.8 x 8.3 in |
| A6 | 105 x 148 mm | 4.1 x 5.8 in |
| A7 | 74 x 105 mm | 2.9 x 4.1 in |
| A8 | 52 x 74 mm | 2.0 x 2.9 in |
| A9 | 37 x 52 mm | 1.5 x 2.0 in |
| A10 | 26 x 37 mm | 1.0 x 1.5 in |
The table above shows the many standard paper sizes. Select the smallest paper size that will fit your entire drawing.
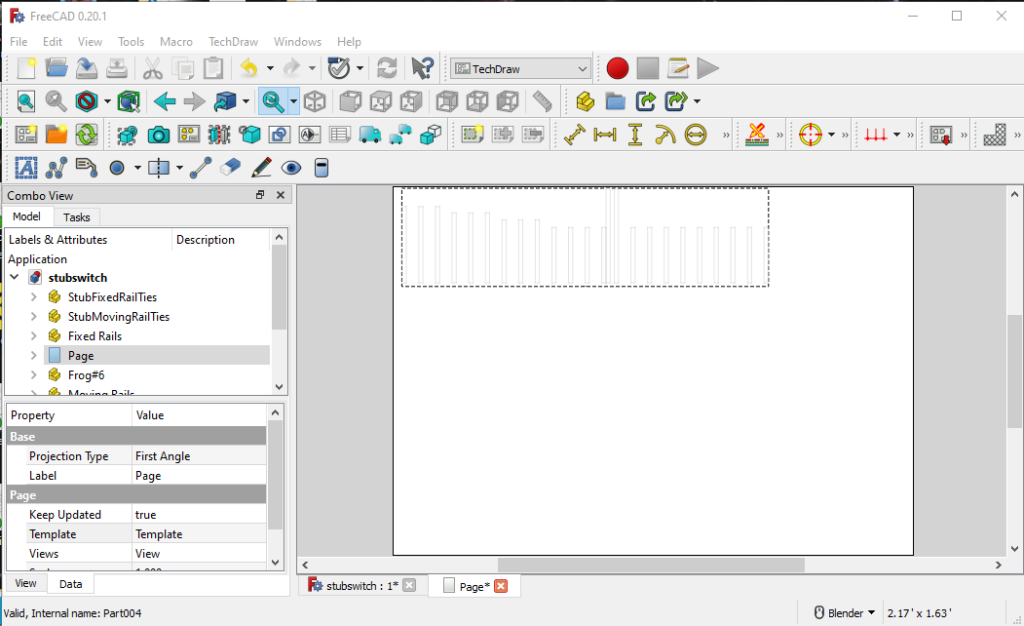
The screenshot above shows the 2D rendering of the stub switch ties on the A0 “page” we just created.
Print A Multi-Page Drawing
Now we have to print a multi-page printout with hashmarks so we can tape them together into one big printout. This is a three step process:
- Print a one page pdf from your drawing program (in this case FreeCAD)
- Print the one page pdf using the “poster” mode of the free Adobe Acrobat Reader.
- Print the desired pages on paper from the multi-page PDF created in step 2
Let’s look at some screen shots of this process
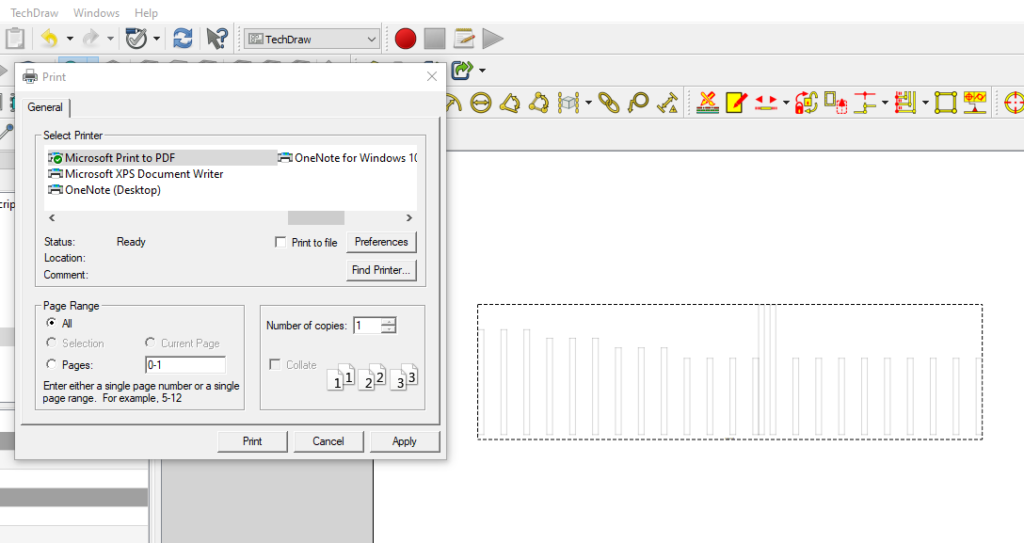
The first step is to print your 2D drawing as a PDF file. This should produce a one page PDF file. In our example I created my technical drawing page on an A0 size paper which is large enough to hold my entire drawing on one page.
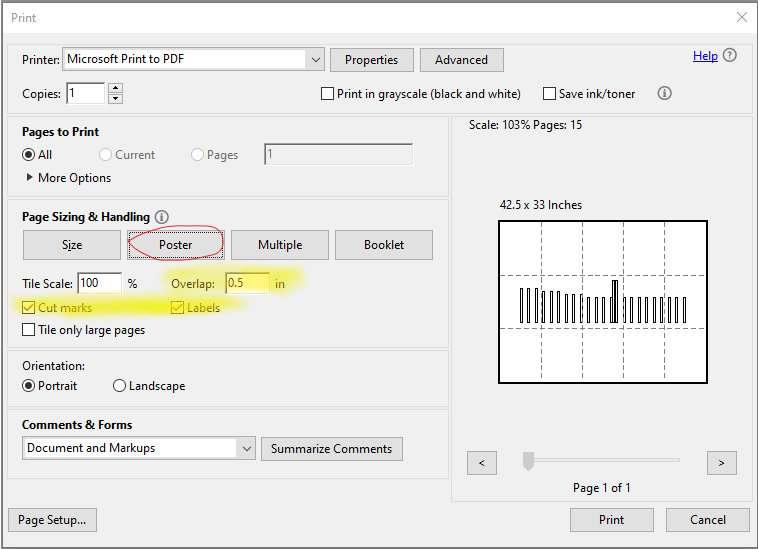
The second step is to create a multi-page PDF with hash marks that you can print and tape together. We are going to print the multi-page output to another PDF file so we can print it to paper at a later time. The Adobe Acrobat Reader (free version) has this great “Poster” function that will divide up the large page into multiple pages you can print on your printer. Notice the overlap setting which controls how much each page will overlap the next page. Also, the “Cut marks” and “Labels” check boxes will add these to the page so you can align each page when you tape them together. Notice the grid of letter size pages that will be printed.
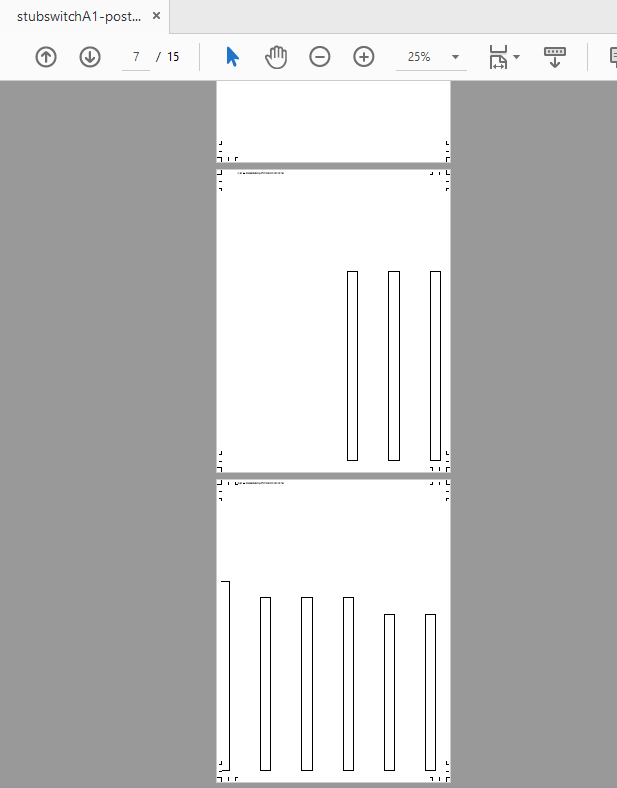
The last step is to actually print some physical pieces of paper. In this screen shot I’ve opened the multi-page PDF and you can see how part of the drawing is on each page. Now just print to your printer but you only need to print the pages that actually have content which in this case is pages 6-10.
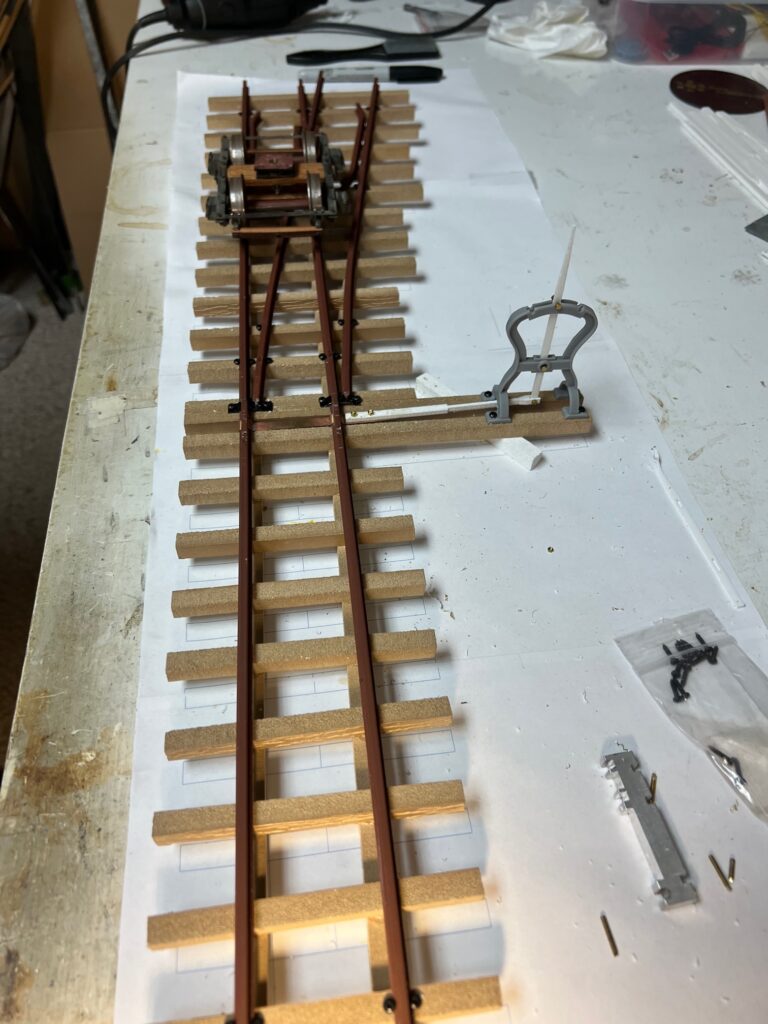
And here is a picture of the switch template pages taped together and being used to build a switch!
And Finally…
Thanks for reading this post and I hope you found it useful. We described how to create and print a multi-page 2D drawing. To see all my FreeCAD posts click here.