In this post we will learn how to create a remote VNC connection to a Raspberry Pi. This means you can login to your Raspberry Pi from any location (assuming you have an internet connection).
In this previous post we looked at the “Virtual Network Computing” capability supplied with the Raspberry Pi and how to VNC into a Raspberry Pi from another computer. VNC provides a client/server program that will allow you to connect to your Raspberry Pi from another computer (typically your laptop or desktop windows machine). It is very typical to work on Raspberry Pi projects where the Pi is “headless” – in other words, there is no monitor attached so the VNC software provides a good solution.
But this basic use of VNC assumes your Raspberry Pi and your laptop/desktop computer are on the same local network. What if you want to have the Raspberry Pi in one location, but you want to access from anywhere else in the world? This is why you need to know how to create a remote VNC connection to a Raspberry Pi.
Getting Started
The first step is to get the VNC client software installed on your laptop/desktop and test out the connection on your local network. How to do this is detailed in this post. Complete this initial setup and then continue on with the following steps.
How Does Remote Access Work
First let’s talk a little bit about how this works. When you use the VNC Viewer on your laptop/desktop to create a local connection to your Raspberry Pi that is happening on your local network. The VNC Viewer program on the laptop is talking directly to the VNC Server program on the Pi. This works fine because the local IP addresses and hostnames are known so the two devices can communicate directly over the local network.
But how can this work if the VNC Viewer program is on a different local network (i.e. a remote location) from the Pi? The answer is using a trusted intermediate server which is provided by the RealVNC company. The RealVNC account you will create in the next step gives you access to this intermediate server. For a remote connection, the VNC Viewer program on your laptop/desktop will login to your RealVNC account server, and that server will handle communicating with your Raspberry Pi VNC Server program. This creates a secure connection that does not require any configuration changes to your local network router or firewall which is a huge advantage.
Create A RealVNC Account
The first step is to create an account on the RealVNC website.
Click here to go to the RealVNC website. On the home page click the “Sign in” button to create your new account.
In the previous post where we setup basic VNC capability you downloaded the VNC viewer program to your laptop/desktop. This was accomplished without creating a VNC account, but now you need one. The good news is they provide a free (but limited) remote connection capability for non-commercial users. As hobbyists/makers we are non-commercial, so this is perfect. I won’t post the screen shots as they change but basically go to the website and create an account. This first thing they want is to verify your email address. Then you select the “Plan” you want to use. Pick the free plan which supports up to 5 Raspberry Pi’s and you’re ready to go. Remember the email/password you used to create this account as we will sign in from our Raspberry Pi and our laptop/desktop computer.
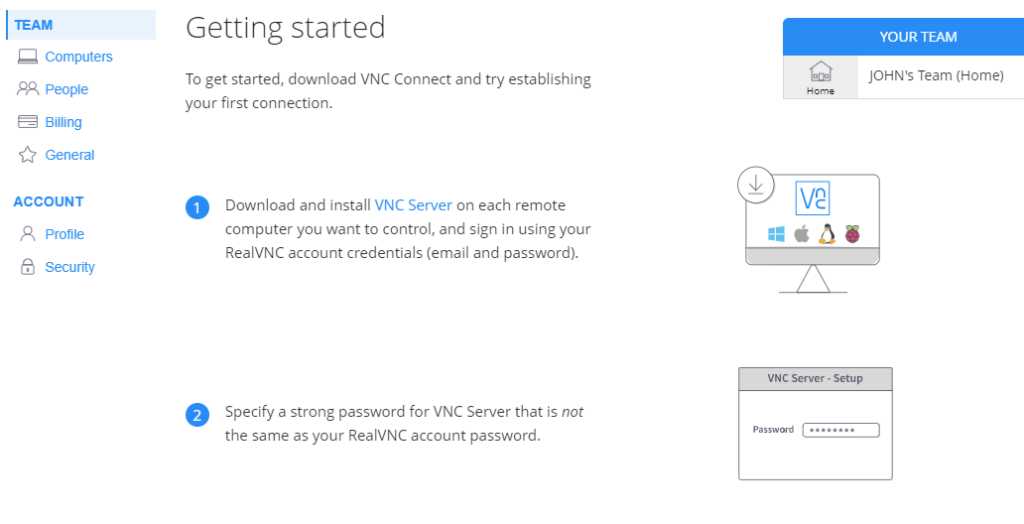
When you login to your account on the RealVNC website you will have a home page as shown below:
Ignore The Instructions
Now this is going to be confusing. Your account home page has these “getting started” instructions but you need to ignore them.
“1” download and install VNC Server. You don’t need to do this because it’s already installed on the Raspberry Pi. You just need to enable it, but you already did that in the basic setup post. (If you have a different linux distribution you can download and install the VNC Server yourself but that is beyond the scope of this post.)
“2” tells you to create a password for the VNC Server but in our case this will be the password for the “pi” userid on your Raspberry Pi.
“3” (not shown) tells you to download the VNC Viewer software but you already did that in the previous post that describes the basic setup.
“4” tells you to login and test the connection and we will describe that below.
Login To Your RealVNC Account From Raspberry Pi
For remote access to work, you must login the Raspberry Pi VNC Server to your RealVNC account created in the step above. This will establish a connection from your Raspberry Pi to the RealVNC servers. This enables the RealVNC server to act as that trusted intermediate server allowing your laptop/desktop to communicate with the Pi.
Login To Your RealVNC Account From The Laptop
On your client machine go ahead and start the VNC Viewer. You will get a screen like below:
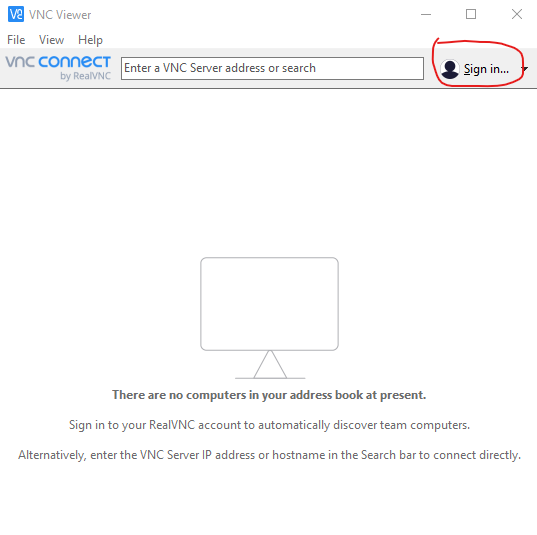
Notice in the upper right hand corner is a “Sign in…” button. This allows you to sign in to your RealVNC account. Go ahead and click on the button and sign in using the email address and password you used to create the account. When you sign in you will see a screen like below:
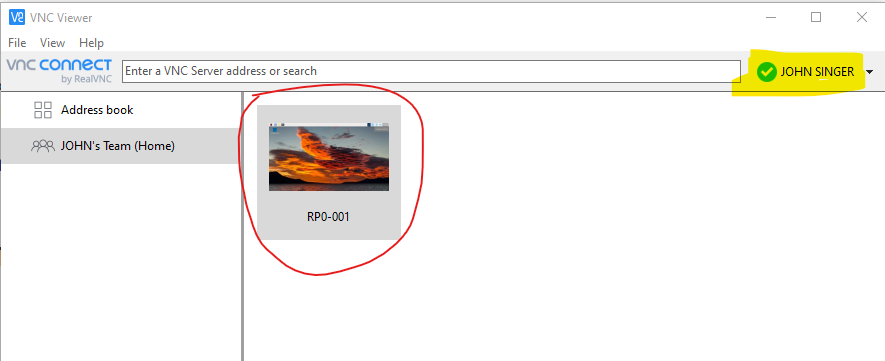
Notice in the upper right hand corner is your name and over on the left hand side is your “team” name. In the middle we will see all the Raspberry Pi’s (up to 5) that we have signed into the RealVNC account (previous step). You can now connect to the Pi shown above as “RP0-001” (you will see the hostname of your Pi).
Test The Remote Connection
Now you’re ready to test the remote connection. Simply double click on the icon representing the Pi you want to remote into. In the screenshot above it is circled in red. You will have to provide the login password for the “pi” user of that Raspberry Pi. See the screenshot below…
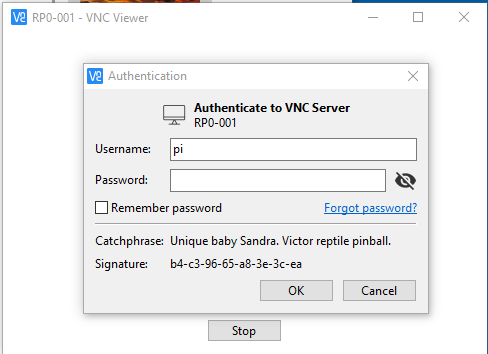
Once you login the Pi desktop User Interface should appear, and you are now remotely connected to your Raspberry Pi! Congratulations on now being able to securely access your Raspberry Pi from anywhere in the world (assuming you have an internet connection).
And Finally…
So that’s it. Not only are you ready to go “headless” with your Raspberry Pi, you will be able to login to the Pi from remote locations just as if you were sitting right next to it. You can work on python programming on the Pi, copy files back and forth, and just do anything as if you were sitting next to the Pi with a monitor and keyboard plugged in.
See all the cool Raspberry Pi Posts here…
Please leave comments or questions below.