
This post will walk you through the steps that explain how to create a user interface for your FreeCAD python scripts. You have created a cool python script that automates some FreeCAD task. Now you want to make it easy to run your macro and provide data input to the script. This post will walk you through how to do just that using Qt to design the User Interface. We will create a project in QT Creator and then modify a simple form in Qt Designer. Finally, we will run the form in QT Creator. You won’t be able to interact with FreeCAD, but you can verify the basic functionality of your form.
There are three posts that cover the entire effort.
- How To Setup QtCreator To Use With FreeCAD
- How To Create A User Interface For Your FreeCAD Python Scripts (this post)
- How To Create A Python Script To Display A Custom Form In FreeCAD
Install Qt Creator
The first thing you need to do is install Qt Creator which is a part of the Qt cross platform toolkit. FreeCAD is written using Qt for the user interface so integrating your own UI’s with FreeCAD is easy using Qt Creator and Python. We detail how to install Qt in this post.
Create A Qt Project Using Qt Creator
Now we want to create a project in Qt Creator. To be honest, all we are using Qt Creator for is to design forms. The only code we will run in Qt Creator is the basic form display script just to do a basic test on our form. In this post we will create a python script that runs our form inside FreeCAD. The python script is generated for you automatically.
There are a few tricky little things to get right when creating a project. Let’s walk through the steps.
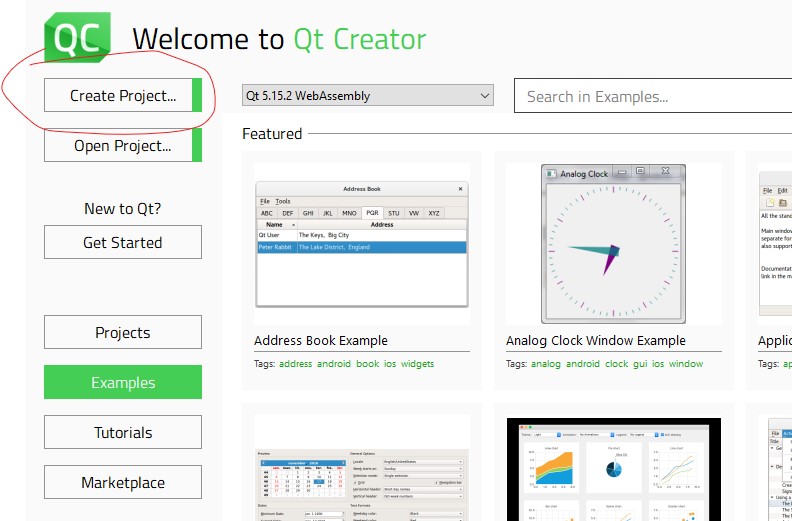
Start Qt Creator and you will come to the home screen shown above. Click on “Create Project…”. This will start the new project dialog.
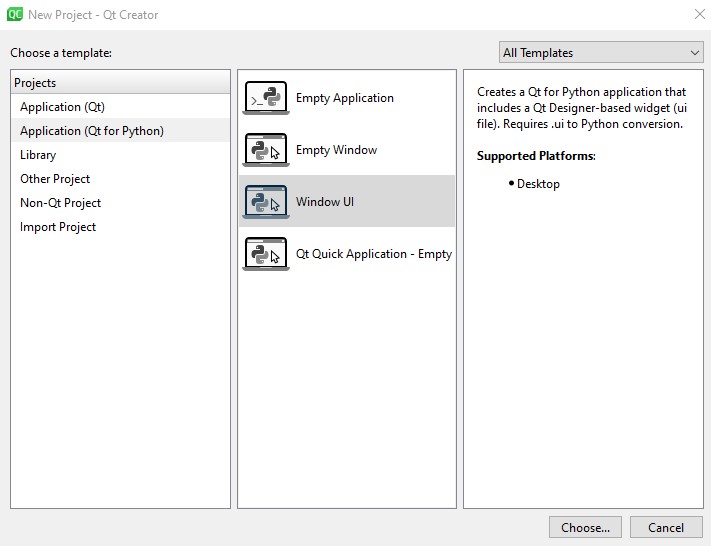
Qt wants to know the type of project. Select Qt for Python in the left column and Window UI in the middle column. Clickon the “Choose…” button.
Location
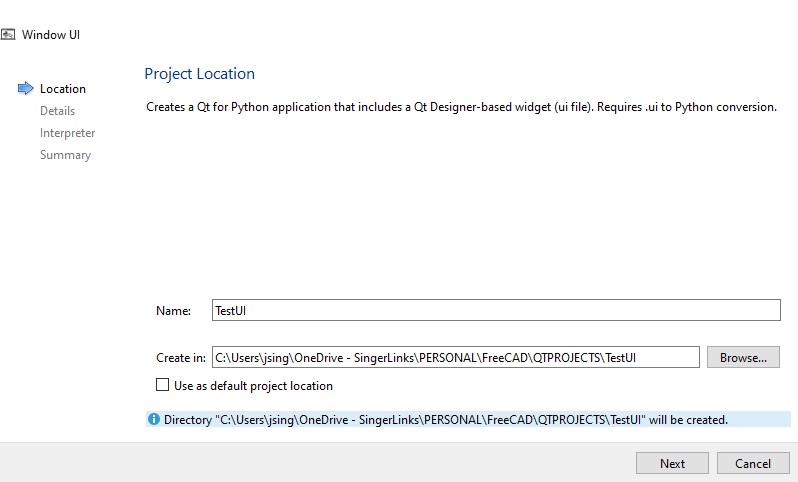
Now you need to tell Qt Creator what the project name is and where to put the project files. Once you’ve completed this click Next.
Details
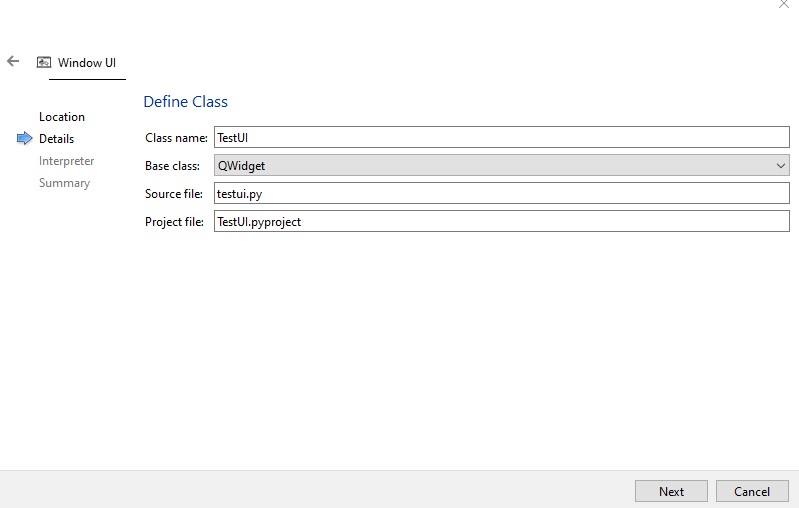
Change the class name to something meaningful which will also change the source file. The Base class defaults to QWidget which is fine if you want your dialog to appear in the task section of the FreeCAD user interface. If you want a separate dialog window to appear then use the dropdown to select QDialog. Click the Next button.
Interpreter
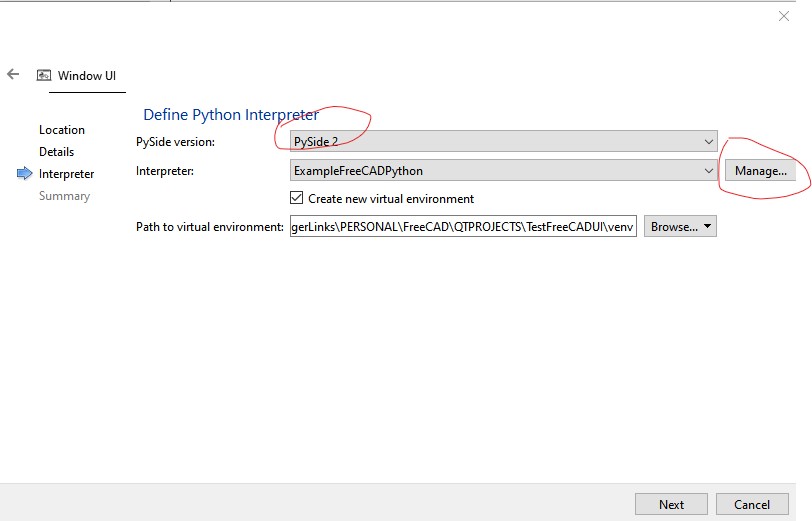
PySide is the python interface to the Qt dll’s. The PySide Version will default to PySide 6 but you want to use the dropdown and change it to PySide2 as this is what FreeCAD uses.
The Interpreter refers to which python.exe file to use. By default the dropdown will show you the installed pythons that Qt has detected but you might want to change this to the python that was installed as a part of FreeCAD. Press the “Manage” button to add another choice to the Interpreter dropdown (see below). After you have defined the location of the FreeCAD interpreter then use the dropdown to select it.
Finally, QtCreator will create a virtual environment if you want. This is handy for keeping your different python projects separated so you should do this.
Click the Next button and on the Summary screen click Finish. This will generate the Qt project, the virtual environment, and some starter code.
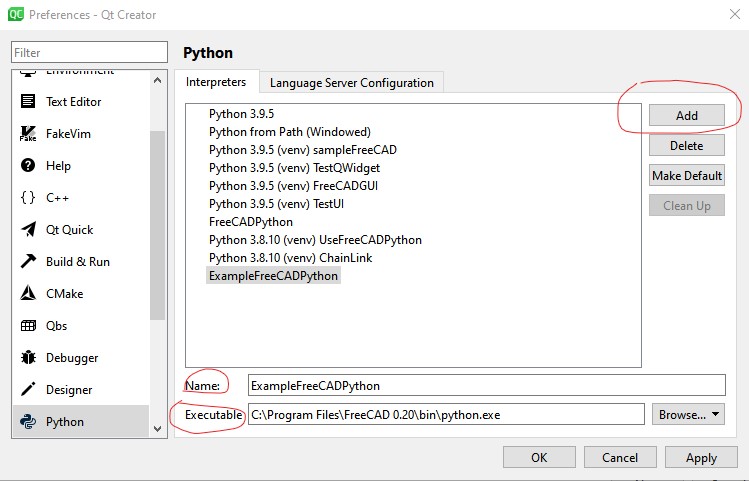
This is the dialog that let’s you define additional python interpreters to use with Qt Projects. Click the Add button and fill in the Name and Executable fields at the bottom. You want to pick the executable that was installed with FreeCAD. As you can see, this is located in the bin folder of the FreeCAD install.
Modify And Run The Python Script
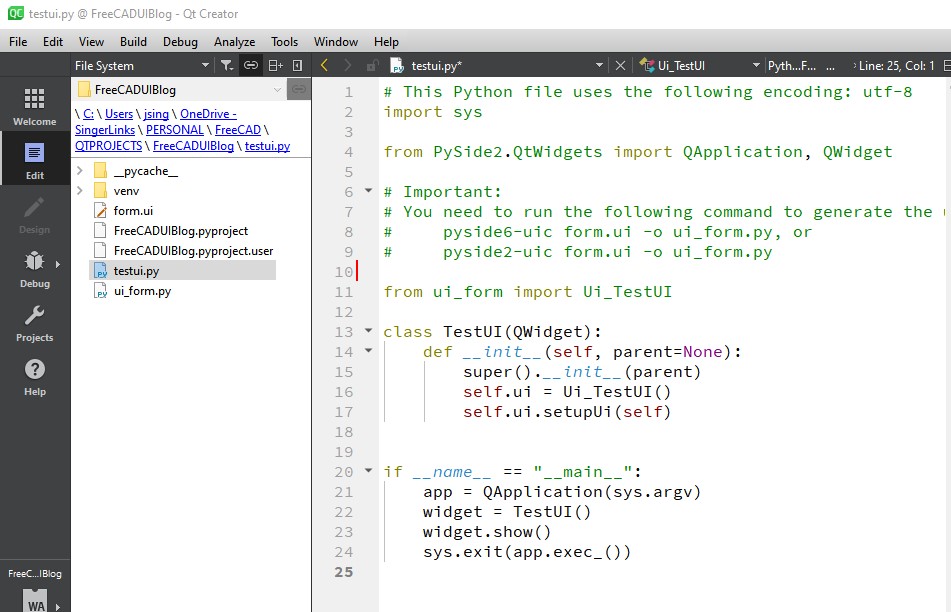
Once the new project is created you will go into the project using Qt Creator. Qt Creator will have generated two files for you. One is a simple python script that will display a form. The second file is a form design file that contains a blank widget or dialog box depending on your choice (see above) when creating the project. In this example I used QWidget.
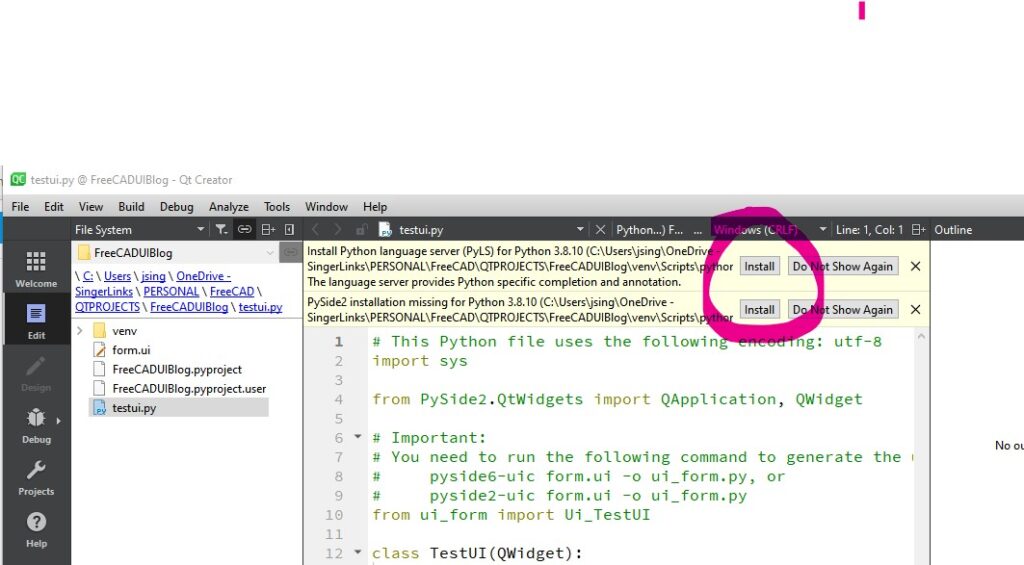
Look at the left hand side and you see the project files in a treeview. Form.ui is the design file for the form and testui.py is the main python script. At the top of the screen you see Qt Creator telling you to install 2 different python modules. Go ahead and click install on both. This will install the modules in the python virtual environment that was created for this project.
# This Python file uses the following encoding: utf-8
import sys

from PySide2.QtWidgets import QApplication, QWidget

# Important:
# You need to run the following command to generate the ui_form.py file
#     pyside6-uic form.ui -o ui_form.py, or
#     pyside2-uic form.ui -o ui_form.py

from ui_form import Ui_TestUI

class TestUI(QWidget):
    def __init__(self, parent=None):
        super().__init__(parent)
        self.ui = Ui_TestUI()
        self.ui.setupUi(self)


if __name__ == "__main__":
    app = QApplication(sys.argv)
    widget = TestUI()
    widget.show()
    sys.exit(app.exec_())
This is the initial python script. It creates an Application object, then it creates a widget object called TestUI that will display the form based on the ui design file. Finally, it shows the widget. If you click the “Run” icon in the far left pane the project will build and attempt to run but it will throw an error. I’ll explain how to fixt this in a minute but first let’s make some simple changes to the UI form itself.
Modify The UI Design File
Look at the project files on the left hand side and you will see form.ui. This is the design file for the form. If you double click on this file you will open Qt Designer (see below).
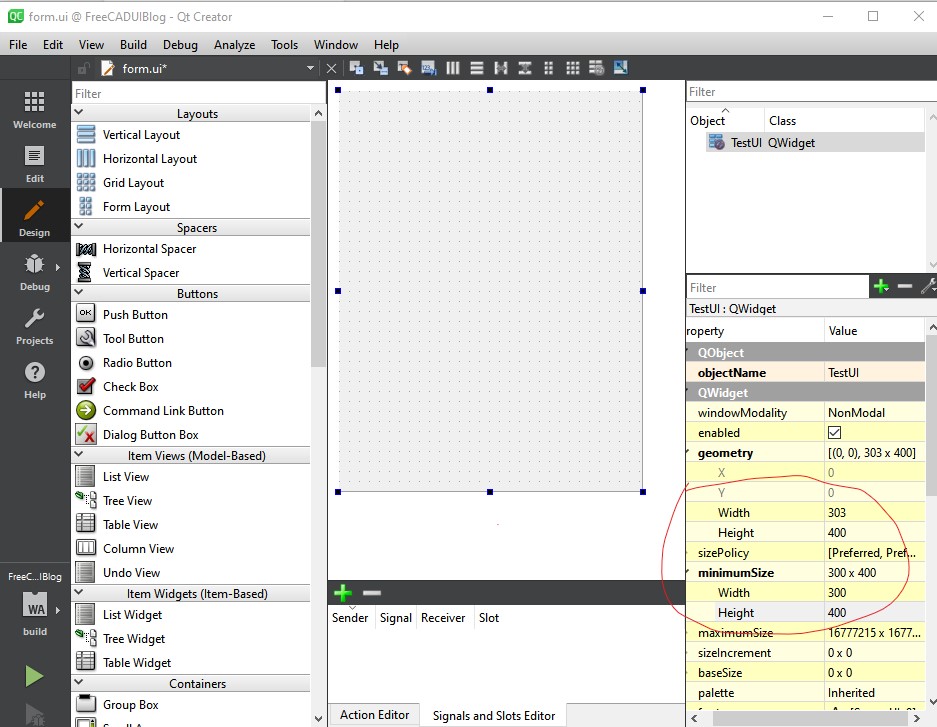
The screenshot above shows Qt Designer with the form.ui design file opened. This is the default widget that was created when we created the project. If you are not familiar with Qt Designer I suggest you take a look at some of the tutorials that are available online. For now I want to show you one thing. Click on the widget itself so it is selected. This will show the properties for the widget on the right. You must set the minimumSize Width and Height to the size you want. This should be the same as the Width and Height shown under geometry which is the current size of the widget as it is displayed in Qt Designer.

All of the GUI widgets are shown on the left hand side. Scroll down to the “Label” widget and drag one onto the surface of the widget we are designing. The label will display “text label” initially. Simply double click on the label and change the text to “Hello World”. You can also scroll down the label properties until you find the “text” property and change it there. Thats it – you now have a Hello World form that can be used in FreeCAD.
Generate The Python Form File
If you want to run your form inside QT Creator you have to generate the python form file. This is useful to verify basic visual functionality of the form before you try to work with it in FreeCAD. Otherwise, you can skip this step and go to the 3rd post in the series that demonstrates how to display this form in FreeCAD.
Look at the top of the testui.py script and you will see the following comment:
# Important:
# You need to run the following command to generate the ui_form.py file
#     pyside6-uic form.ui -o ui_form.py, or
#     pyside2-uic form.ui -o ui_form.py
This is telling you that you need to run the pyside2-uic utility that will take the form.ui design file we just modified and generate a python file called ui_form.py. In fact, if you click the “Run” icon in the far left pane the project will build and attempt to run but it will throw an error. This is error is because you attempted to import from ui_form.py and it doesn’t exist.
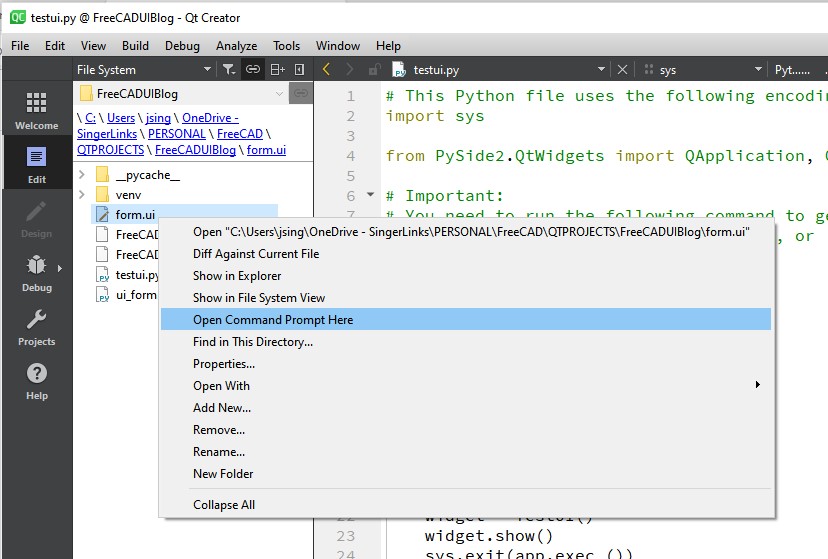
Surprisingly, QtCreator doesn’t provide an easy way to run the utility. You need to run it from a command line. Right click the form.ui design file and select “Open Command Prompt Here”. This will open a terminal window at this file location.
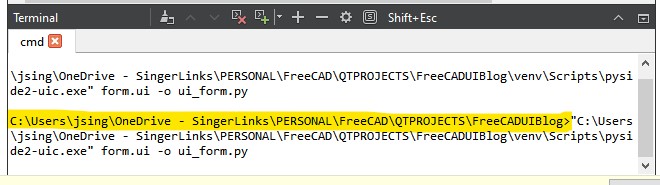
The location of the ui design file is highlighted in yellow. The command is shown next. It runs the pyside2-uic.exe program which is in the virtual environment scripts folder of your project. You will have to figure out where this is located. The command itself is pretty simple and it is shown in the comment code (see above).
pyside2-uic form.ui -o ui_form.pyIf you are successful, you have have a new file in your project file list called ui_form.py (see below). Double click on the ui_form.py file and you can see it in the editor.
# -*- coding: utf-8 -*-

################################################################################
## Form generated from reading UI file 'form.ui'
##
## Created by: Qt User Interface Compiler version 5.15.2
##
## WARNING! All changes made in this file will be lost when recompiling UI file!
################################################################################

from PySide2.QtCore import *
from PySide2.QtGui import *
from PySide2.QtWidgets import *


class Ui_TestUI(object):
    def setupUi(self, TestUI):
        if not TestUI.objectName():
            TestUI.setObjectName(u"TestUI")
        TestUI.resize(303, 400)
        TestUI.setMinimumSize(QSize(300, 400))
        self.label = QLabel(TestUI)
        self.label.setObjectName(u"label")
        self.label.setGeometry(QRect(120, 50, 81, 16))

        self.retranslateUi(TestUI)

        QMetaObject.connectSlotsByName(TestUI)
    # setupUi

    def retranslateUi(self, TestUI):
        TestUI.setWindowTitle(QCoreApplication.translate("TestUI", u"TestUI", None))
        self.label.setText(QCoreApplication.translate("TestUI", u"Hello World", None))
    # retranslateUi
This is the generated form file. It creates a class that will display your form. As the comment says at the top, don’t change this python script. You simply regenerate it every time you change the design file.
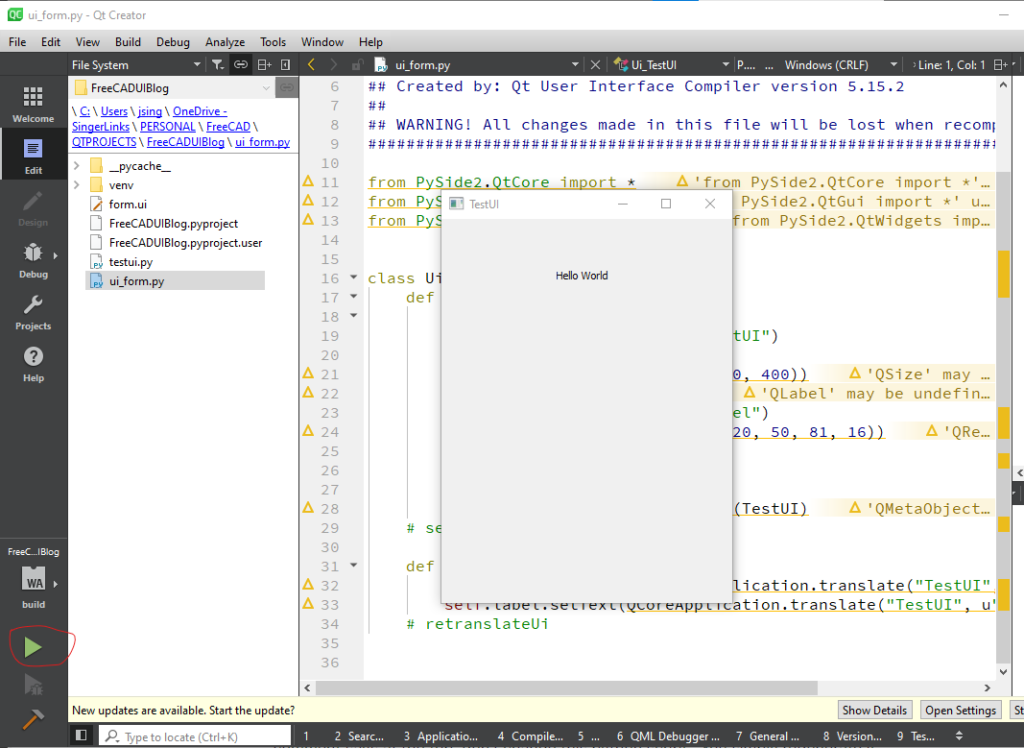
Now if you click on the run button at the bottom left hand side you should see your Hello World form being displayed!
And Finally…
In this post we showed you how to create a user interface for your FreeCAD python scripts. In the next post we will show you how to display this form in FreeCAD.